
Scope: domestic Malaysian ringgit only. If you invoice or pay in a foreign currency, the mechanics here still apply, but see the Multi-currency guide for the extra steps. This guide also assumes you do not track physical stock. If you carry inventory, see the Inventory guide once it exists for goods receive, delivery orders and stock movements. Closing a period is its own guide, already live.
Time: not a single sitting. This is a reference to come back to as each document type comes up in your real work, not a one-time checklist.
1. Set up what you sell
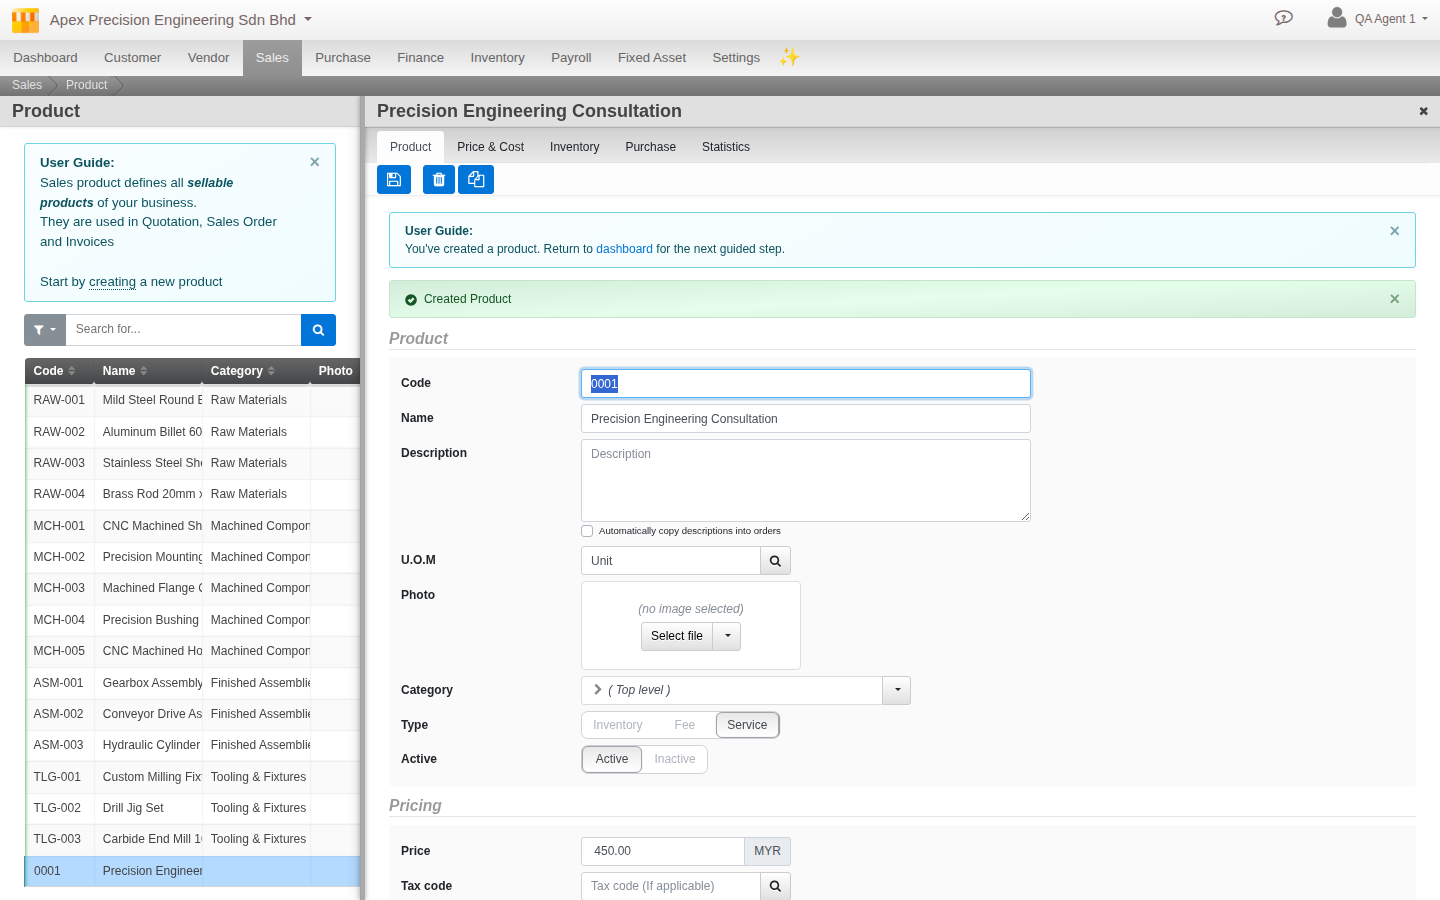
Open Menu > Sales > Settings > Product. Cloudby has three product types: Service, Fee, and Inventory. This guide covers Service and Fee, since it assumes you are not tracking physical stock. Either type works the same way for everything in this guide: give it a name, a selling price, and a tax group if applicable.
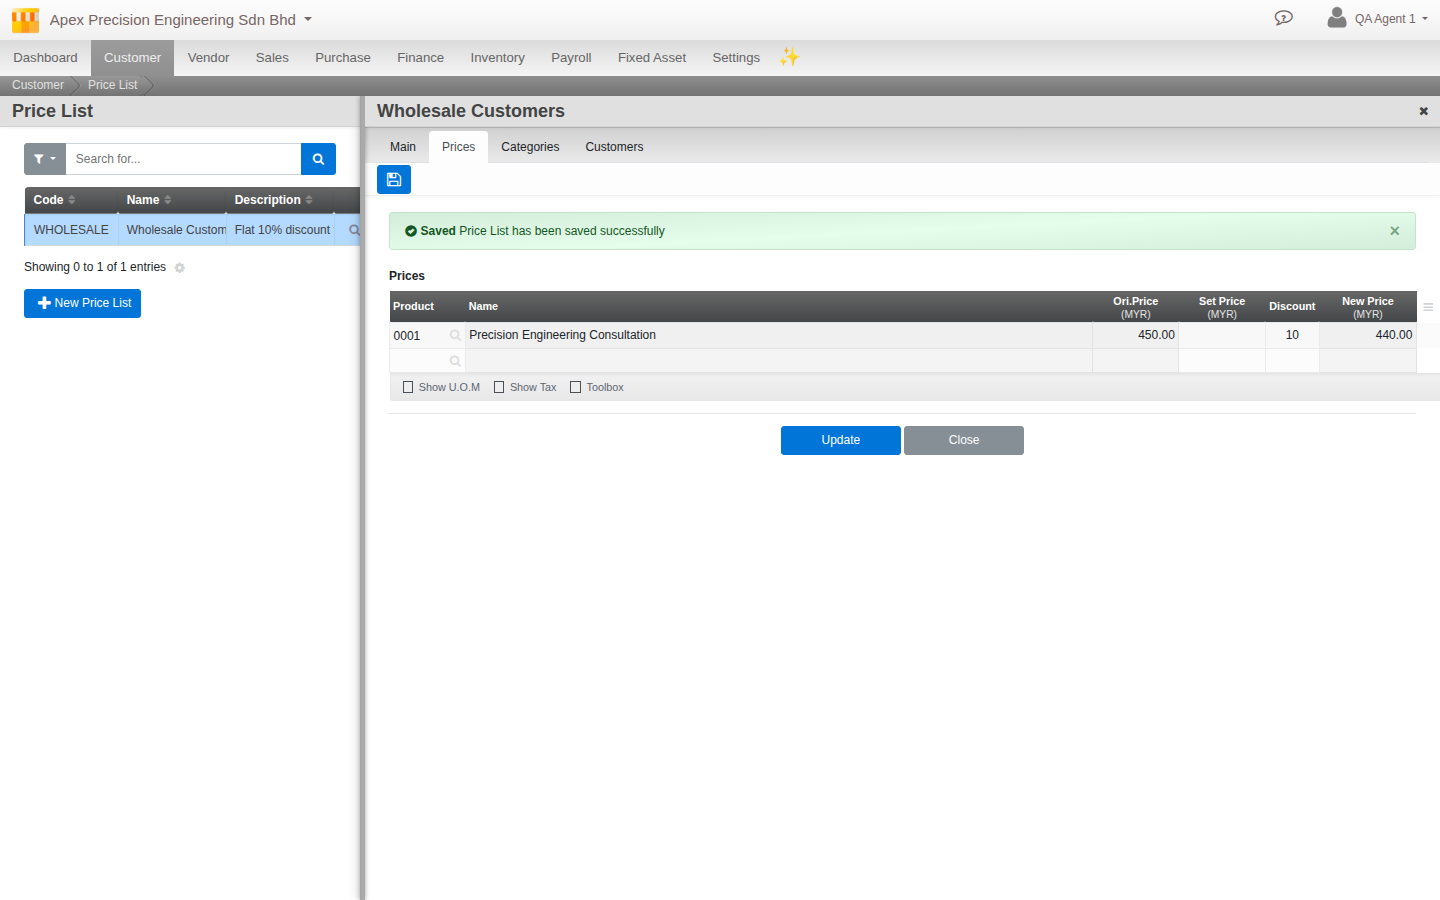
If different customer segments should see different pricing, set up a Price List under Menu > Customer > Pricelist. A Price List works in one of two modes: a flat discount off your normal prices, or a completely separate set of prices. It reaches a customer through that customer’s Category, not by assigning it to individual customers one at a time. There is no quantity-tiered pricing, so a Price List cannot say “10 percent off once you buy 50 units,” only a flat rate or discount per product.
2. Add your first customer
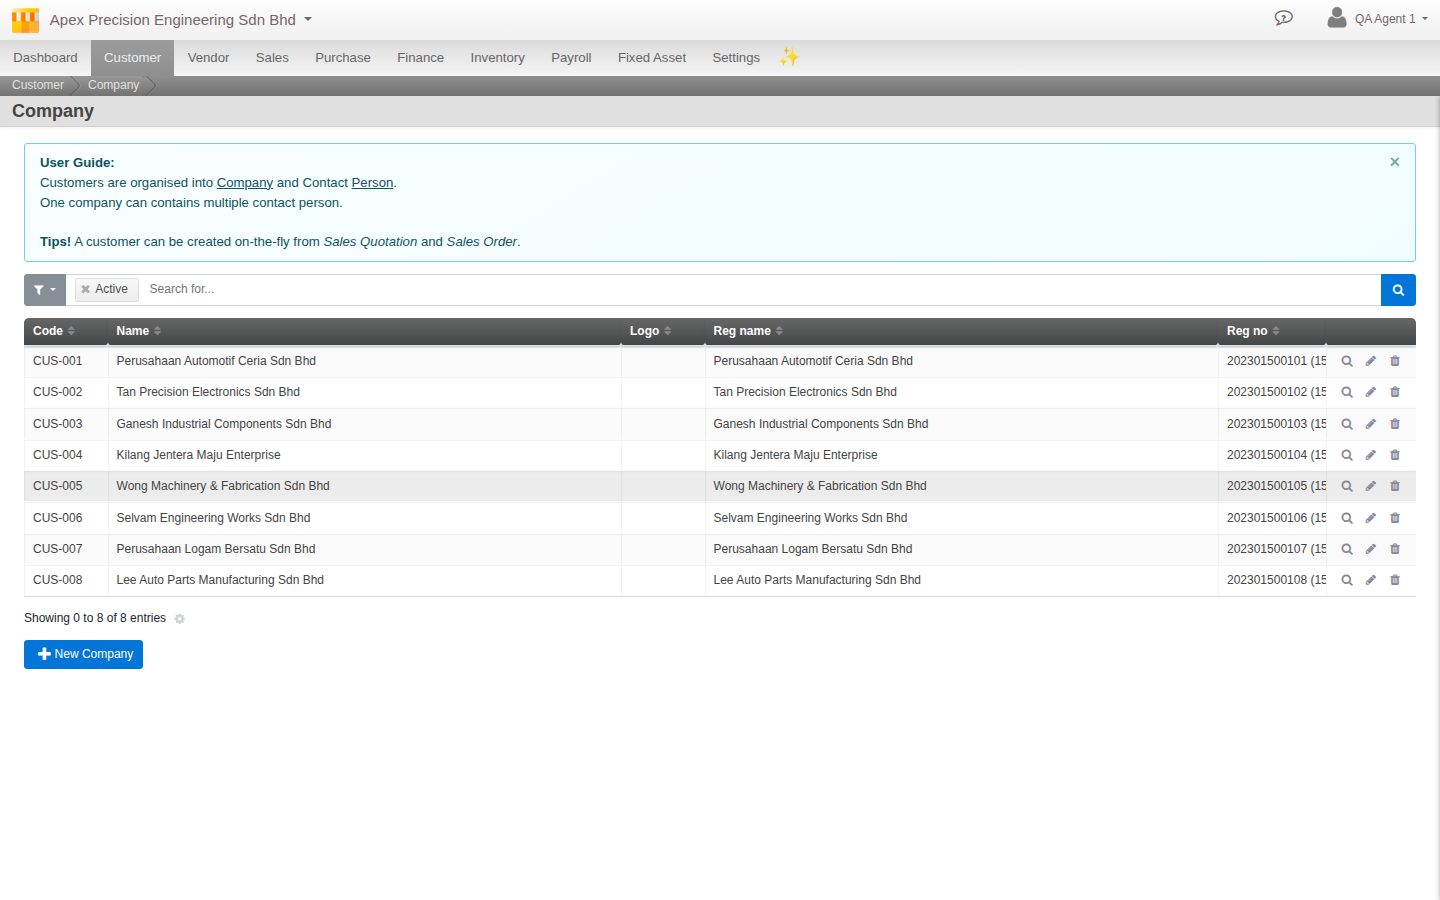
Open Menu > Customer > Company > New Company and add the business or person you are about to invoice: name, registration number, address, and so on. This is the same screen covered in the go-live guide, worth revisiting here since day-to-day operations means adding customers regularly, not just once at setup.
3. Raise a Sales Invoice
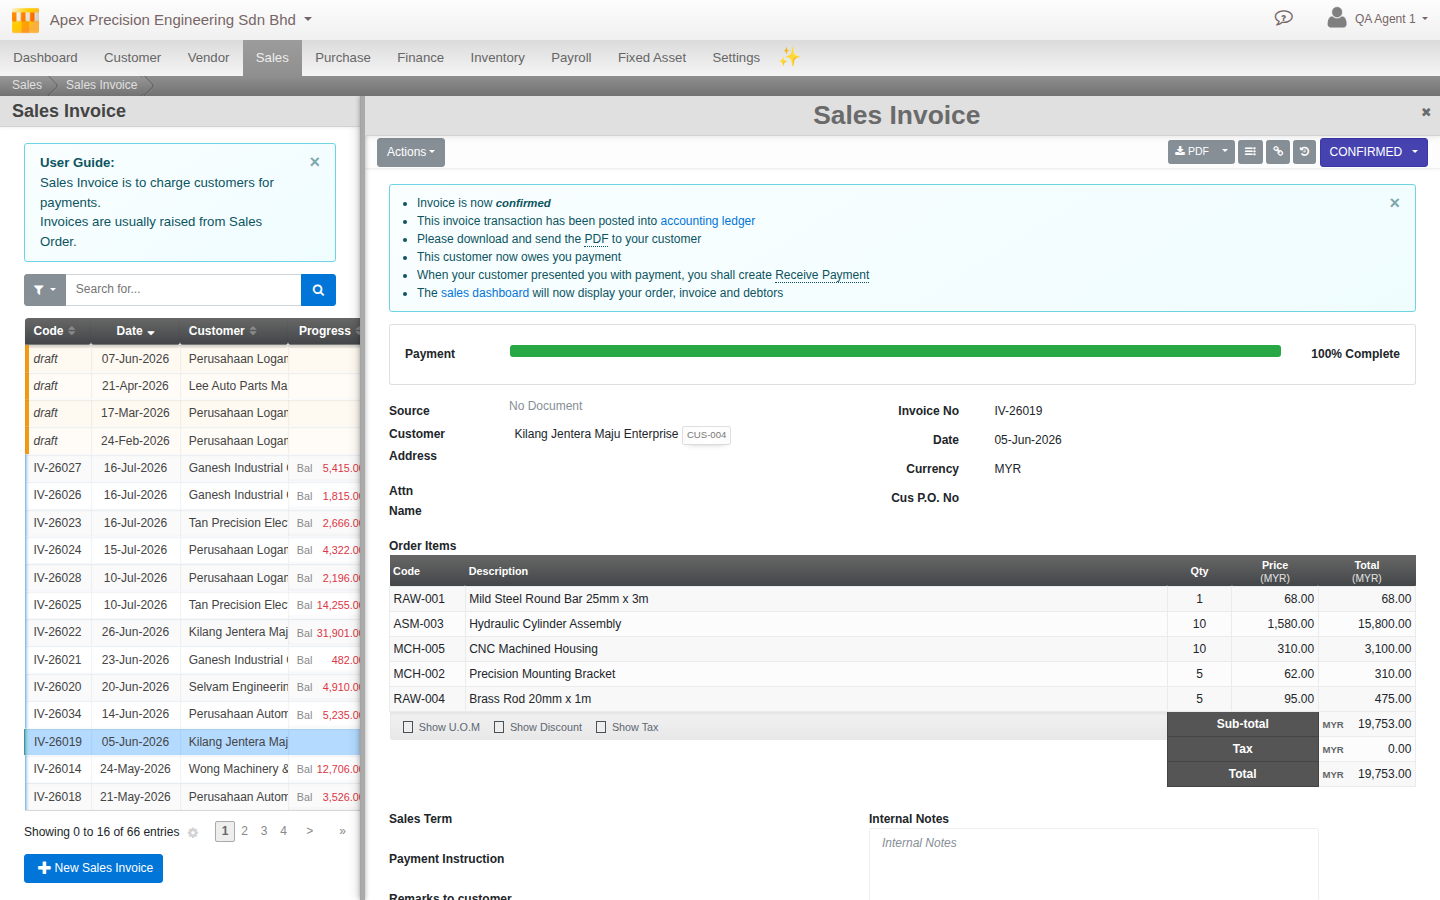
Open Menu > Sales > Sales Invoice > New. For most domestic day-to-day selling, an invoice stands on its own: you do not need a Quotation or Sales Order behind it first. Pick the customer, add a line for what you are selling, and confirm. A Sales Order is only worth the extra step when you want to bill one commitment across several invoices over time, for example by item, as a lump sum, or by milestone.
Confirming the invoice is also the moment e-Invoice submission happens, if e-Invoice is active for your organisation. The invoice parks in an “E-Invoice” status while LHDN reviews it, then moves to Confirmed automatically once accepted, or back to Draft if rejected so you can fix it and resubmit.
4. Issue a Credit Note when something needs reversing
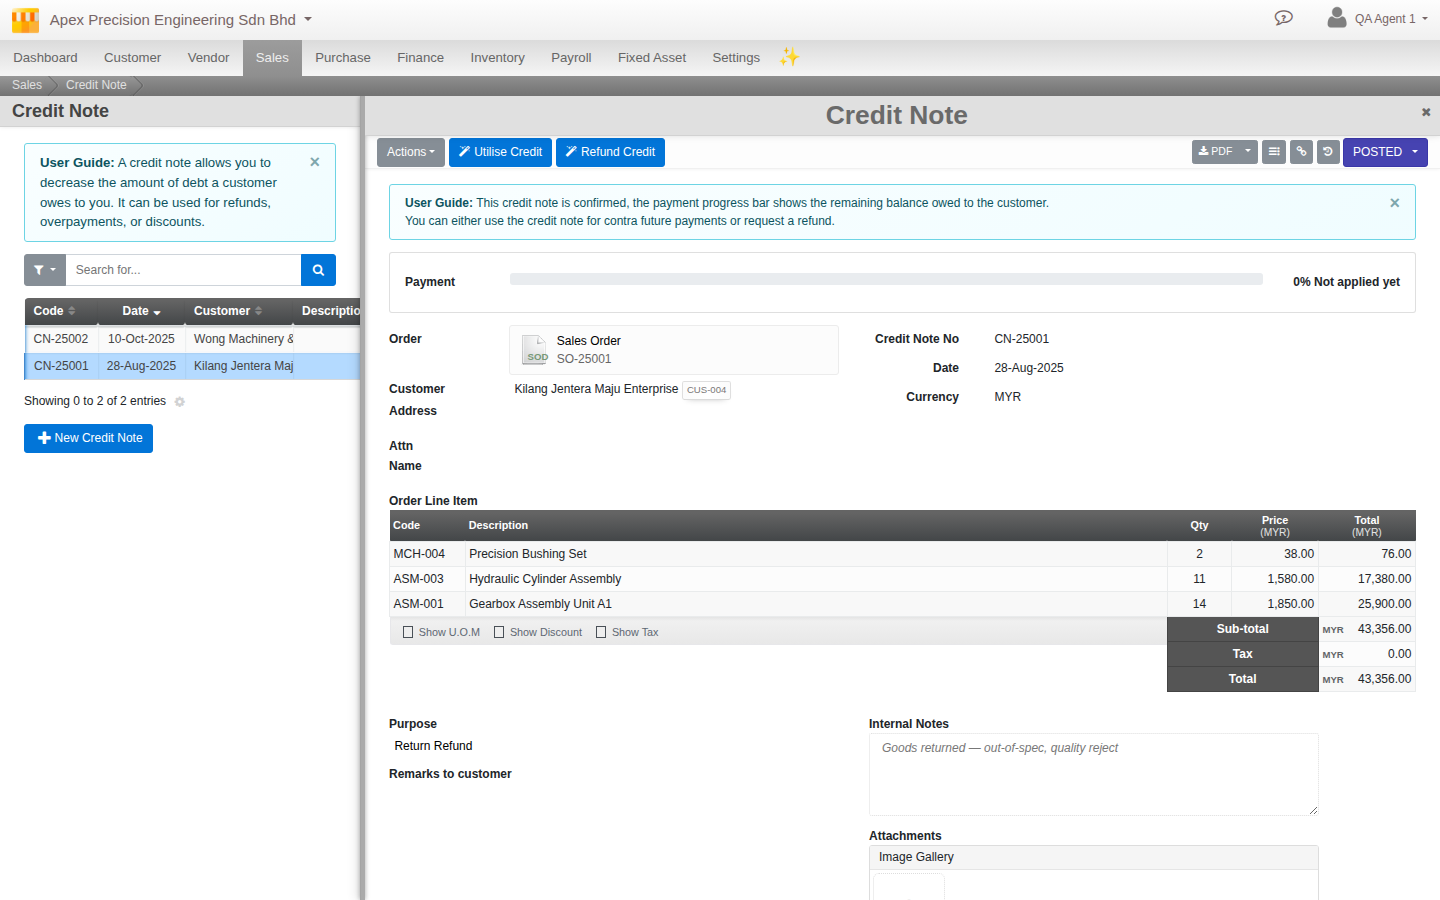
Open Menu > Sales > Credit Note > New, or generate one directly from the invoice you are correcting. A Credit Note follows the exact same lifecycle as a Sales Invoice, including e-Invoice submission if active. It lowers what the customer owes and posts the reversal to your books.
A Credit Note can be for the full invoice or a partial amount, either against specific line items or a specific dollar figure. Give it a purpose when you create it: Return Refund, Discount Refund, or Adjustment, so your records show why the credit was issued, not just that it was.
5. Receive the customer’s payment
Open Menu > Finance > Receive Payment > New. Pick the customer, and you will see every open invoice they owe on. One payment can be applied across several invoices at once, and a single large invoice can just as easily be paid down over several separate payments over time. The amount you apply against invoices has to match the amount coming in through your chosen payment source.
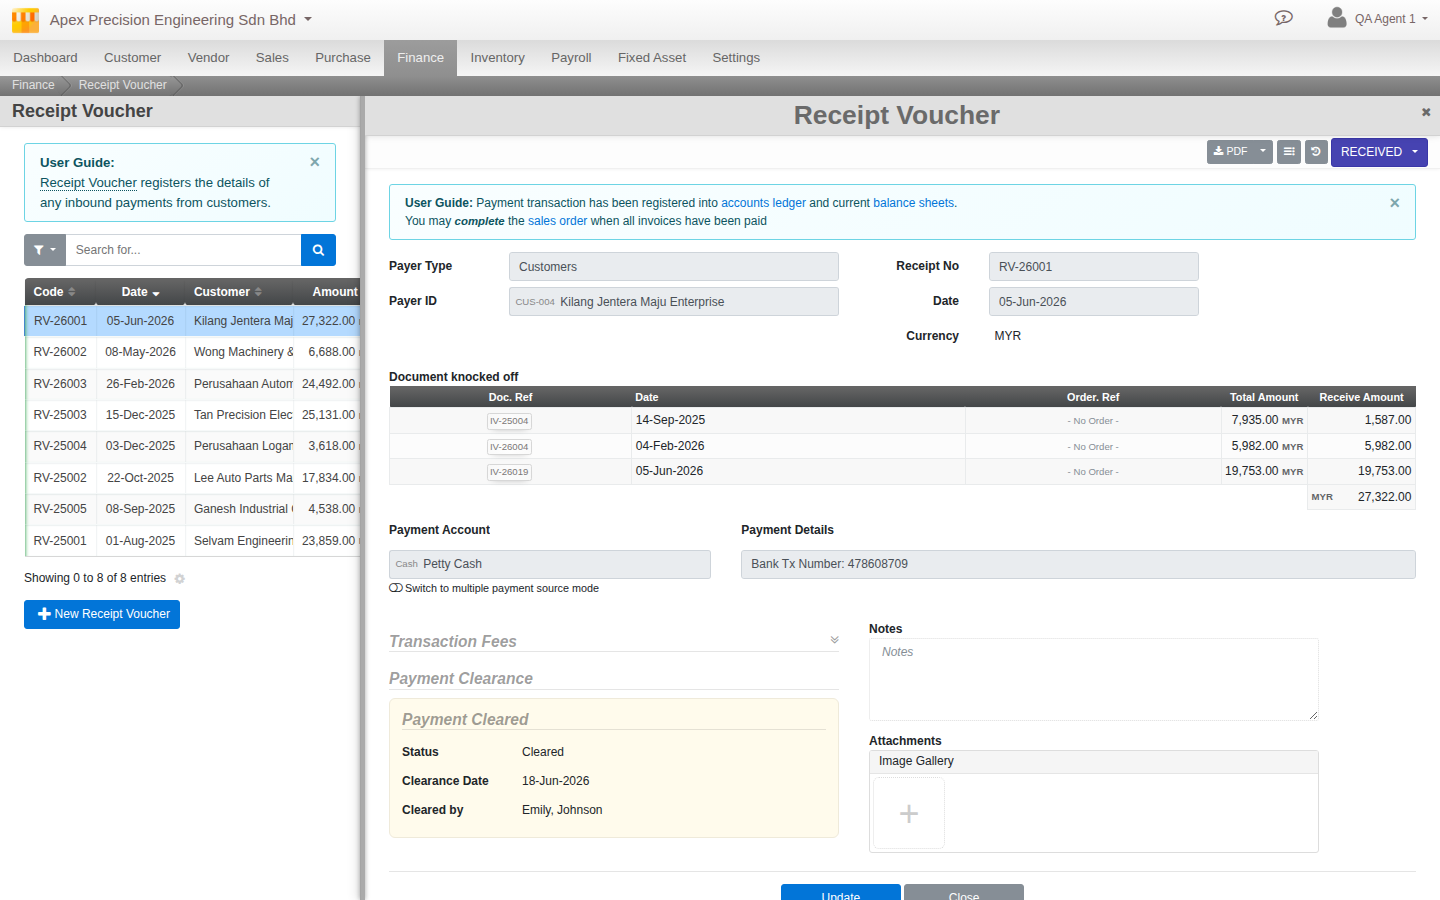
Payment method is just Cash or Bank. There is no separate Cheque or Card method. If a customer pays by cheque, record it as a Bank payment and put the cheque number in the reference field, it is a detail on the payment, not a method of its own.
6. Record what you owe
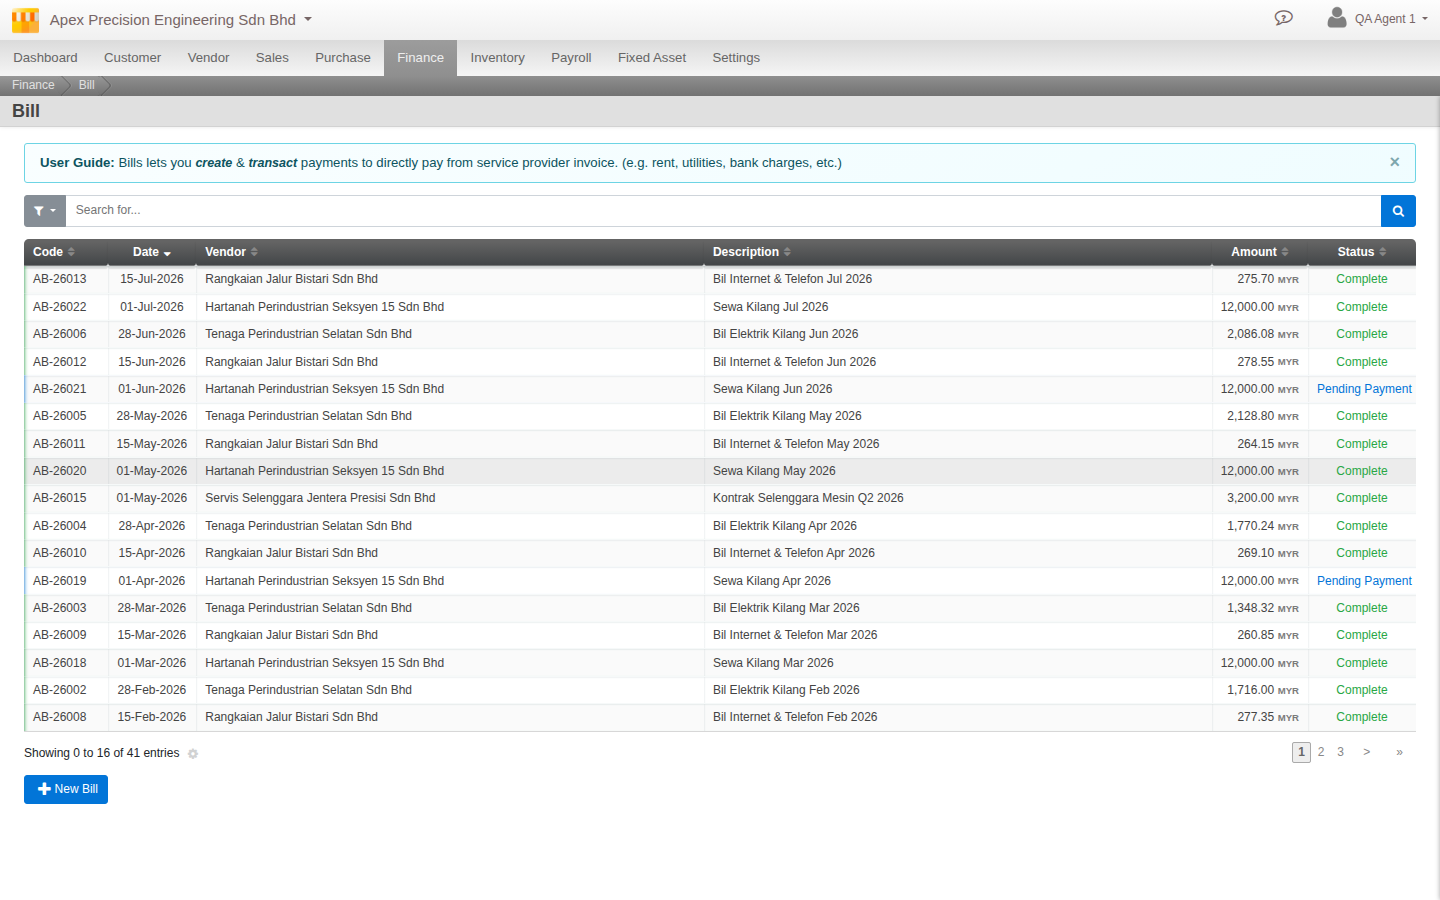
Open Menu > Finance > Bill Payment > New for the everyday case: a vendor bill with no Purchase Order behind it, a one-off expense, a subscription, a utility bill. A Bill lets you record the bill and, if you want, settle it in the same document.
Cloudby also has a separate Purchase Invoice document, used when a Purchase Order and a goods-received step precede the bill, so the three can be matched against each other. That belongs to a fuller procurement chain outside this guide’s day-to-day scope; use Bill for the domestic no-order case this guide covers. If a posted Bill or Purchase Invoice needs correcting afterward, the purchase-side equivalent of a Credit Note is a Debit Note, and the original document stays untouched.
7. Pay it
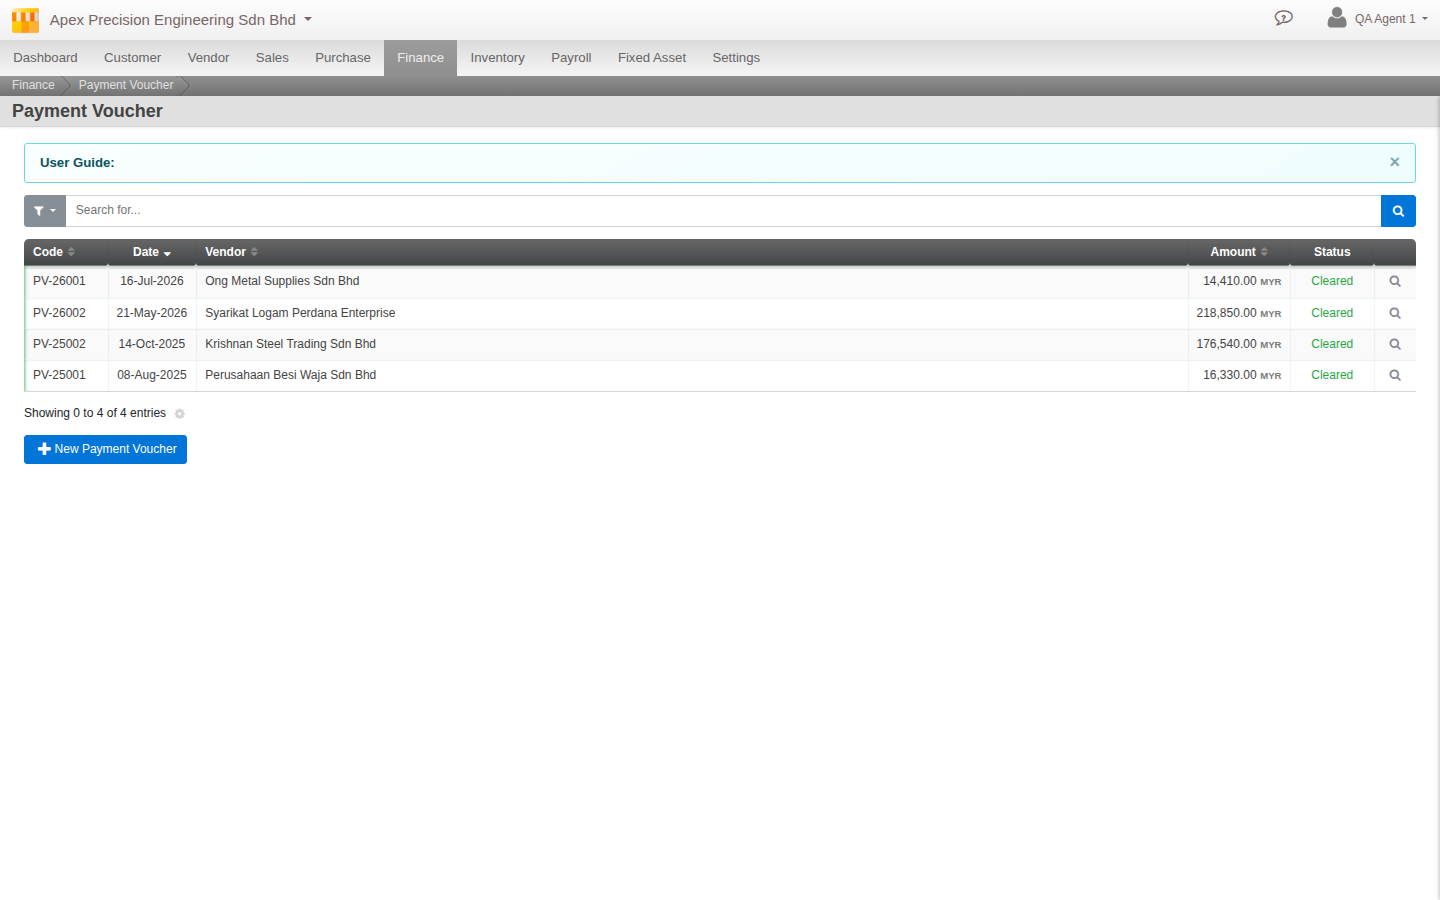
A Bill gives you two real paths. Confirm on its own posts the bill to your payables and leaves it Pending Payment for later. Or confirm and pay in the same action, marking it Complete immediately. If you left a Bill or Purchase Invoice Pending Payment earlier, settle it later through Menu > Finance > Issue Payment > New, the mirror of Receive Payment on the vendor side: one payment can cover several bills at once, and payment method is again Cash or Bank only.
8. Reimburse an employee
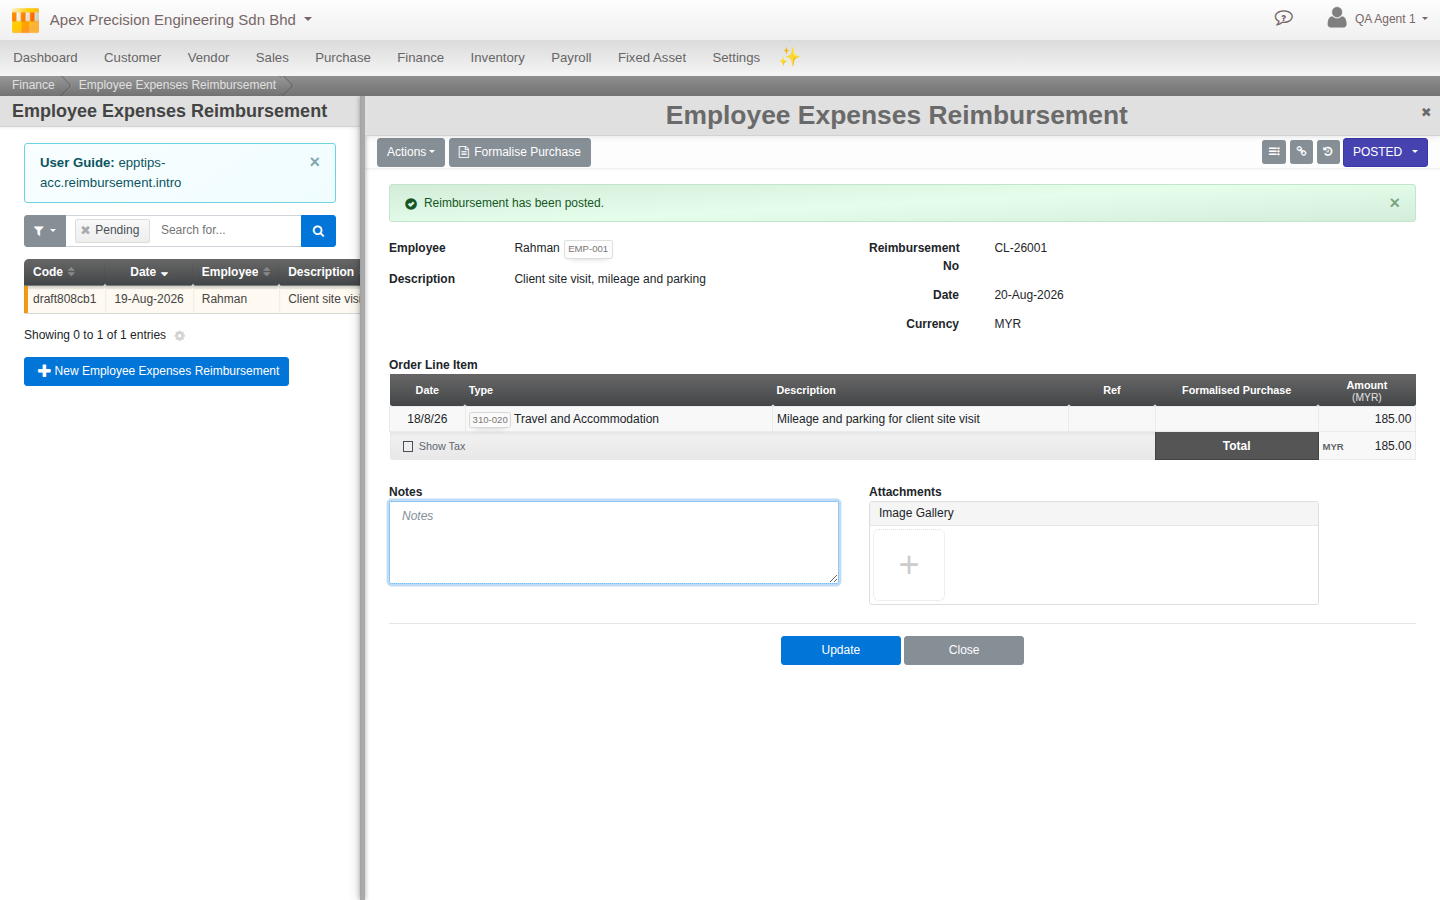
An employee submits their own expense claim from My Workplace > Claim Your Expenses, entering what they spent and on what. From there it moves through a short approval chain: submit for review, then Accepted, then Posted by Finance. Posting is what creates a real liability on your books, an amount the business owes that employee, tagged to them individually, not just a note in a spreadsheet somewhere.
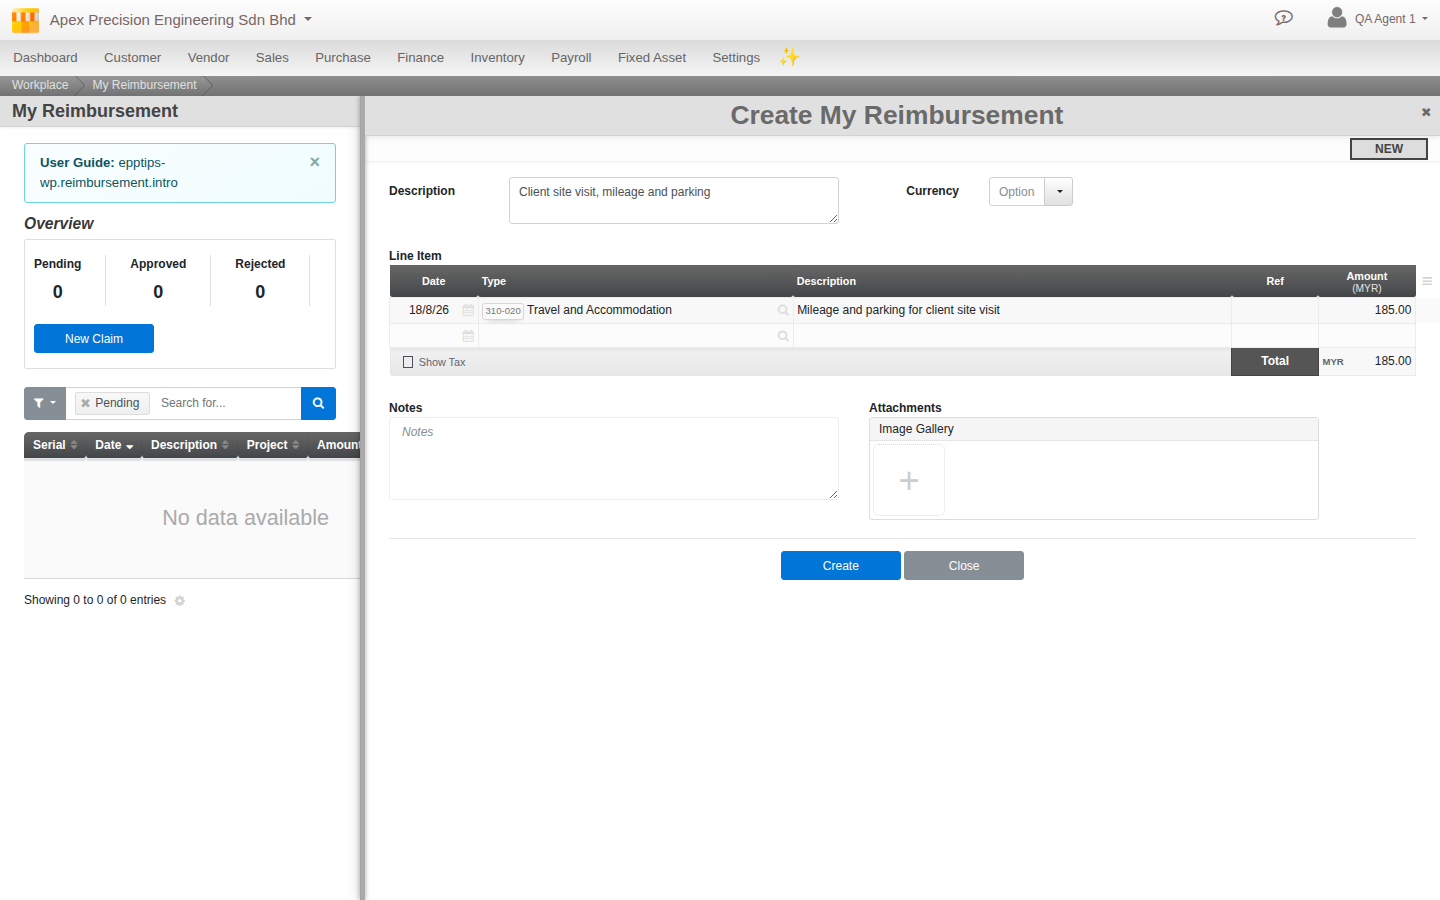
Once posted, the simplest way to settle it is a direct Issue Payment to the employee, the same screen from step 7, with Employee as the payee type. If your organisation runs payroll, there is also an opt-in payroll item that automatically pulls an employee’s outstanding reimbursement balance onto their next payslip instead, covered in the Payroll guide once it exists.
9. Take a look at your numbers
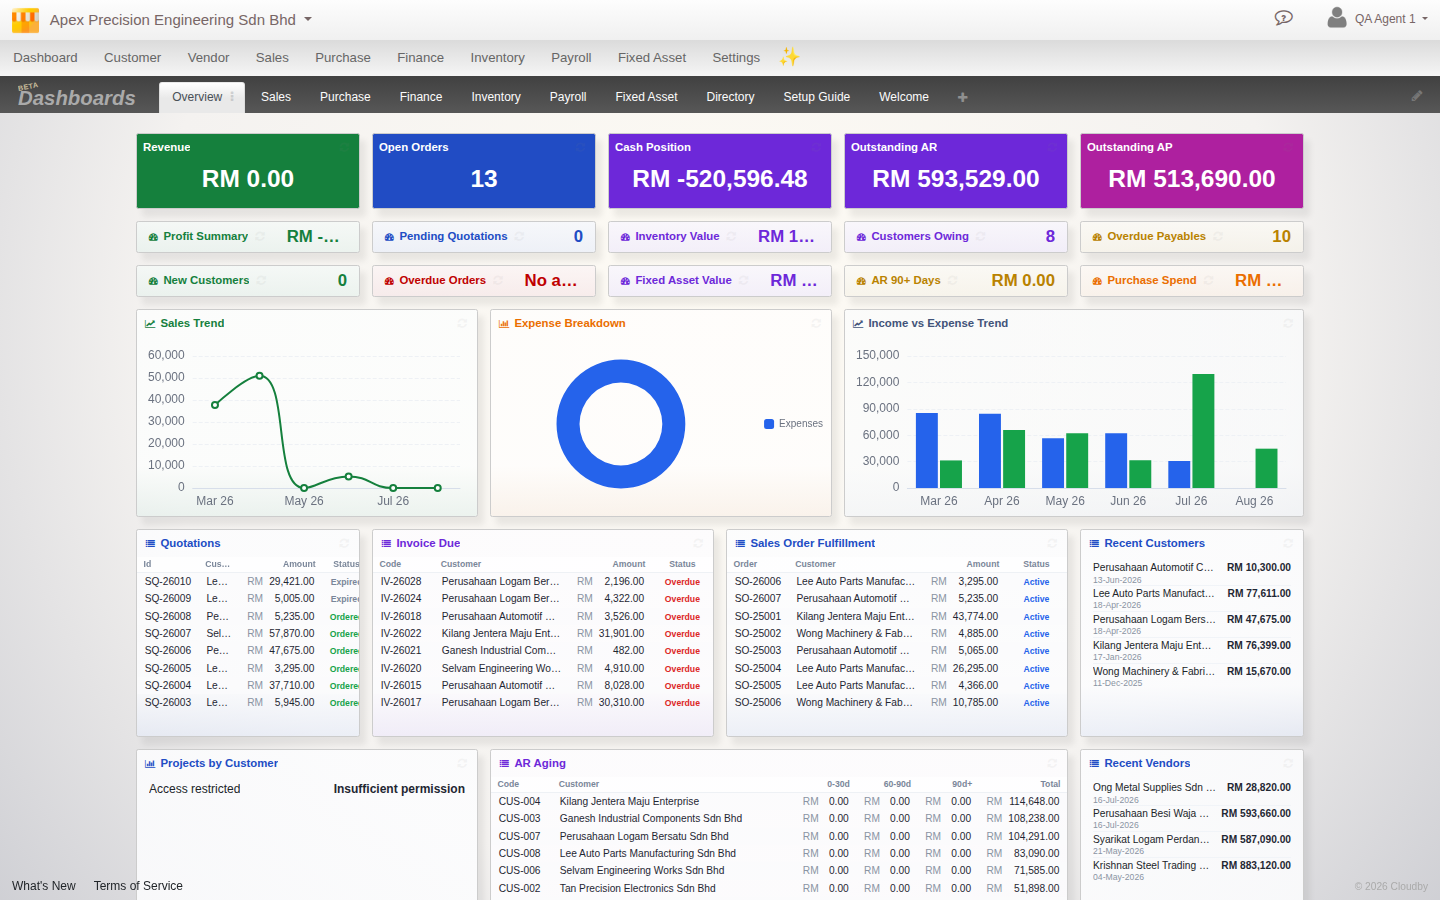
The fastest zero-click glance is right on your Dashboard: the Receivables Aging widget shows who owes you money and how overdue it is, with a direct link through to the full report. Beyond that, five reports cover most of what a day-to-day business owner actually needs to check:
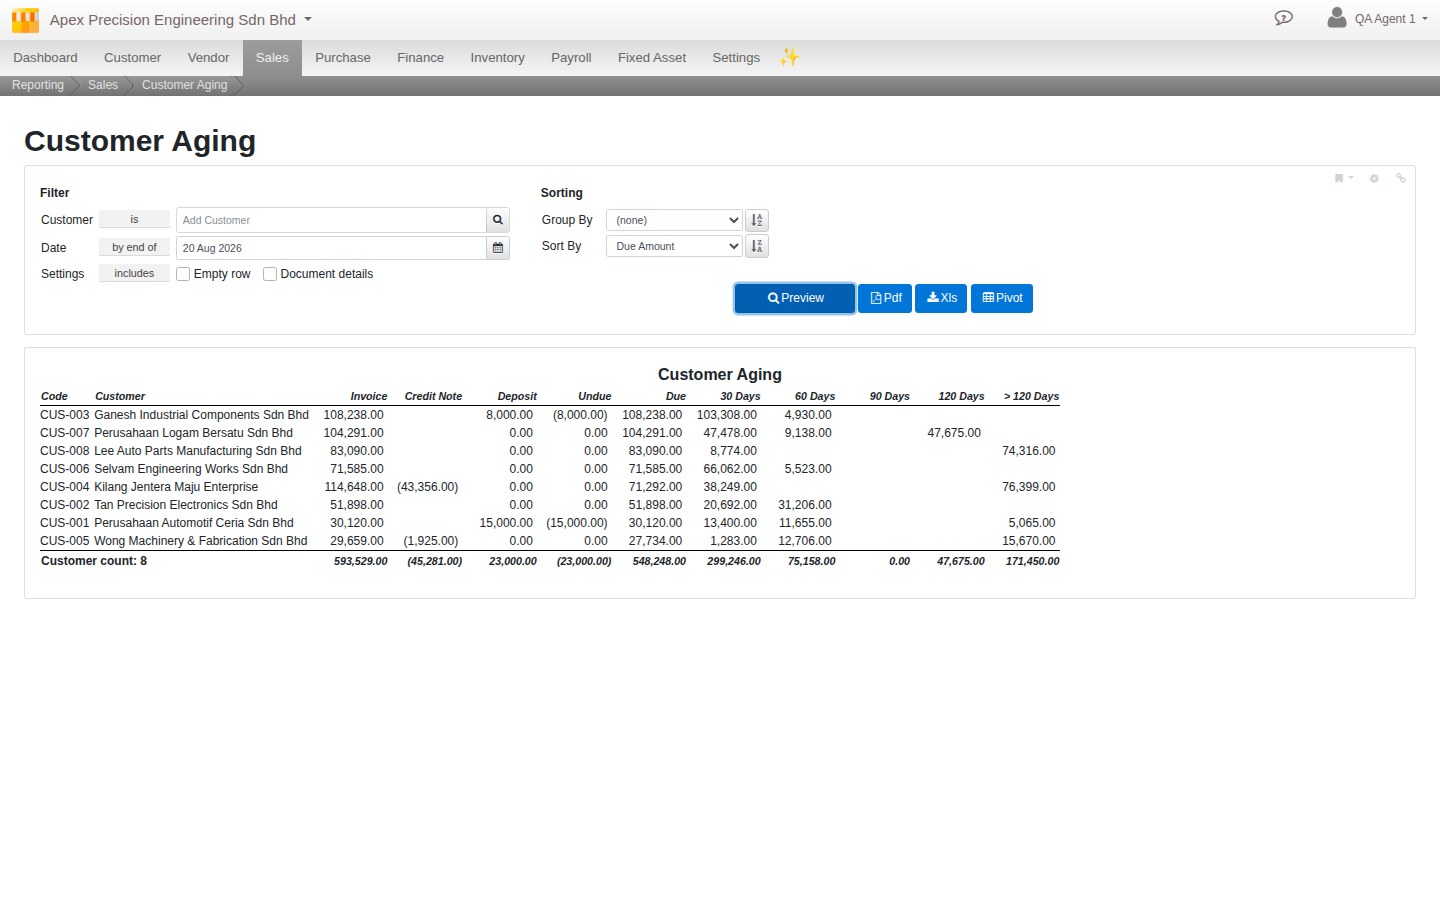
- Customer Aging (Menu > Sales > Reports): who owes you, and how overdue, broken into ageing buckets.
- Vendor Aging (Menu > Purchase > Reports): the same view on what you owe, and how soon it is due.
- Bill Payments (Menu > Finance > Reports): every bill and its payment state in one list.
- Sales Invoice listing or Revenue by Month (Menu > Sales > Reports): a straightforward sales summary without building a report from scratch.
- Profit and Loss (Menu > Finance > Reports): the simple glance at whether the business made money over a period.
What’s next
This guide covers the domestic, non-inventory core. A few real directions to extend it, each its own guide:
- Multi-currency extends this guide directly: the same invoice, bill and payment mechanics, plus foreign-currency rates and revaluation at period end.
- Inventory covers the physical-goods side this guide deliberately leaves out: Purchase Orders, goods receive, delivery orders, stock movements and valuation.
- Fixed assets and Payroll each cover their own document cycles, independent of the flow above.
- Once you are ready to lock a month or a financial year, Closing your financial year is already live and picks up from here.
Scenarios and troubleshooting
I confirmed an invoice and now need to change it.
You cannot edit a Confirmed invoice in place. Issue a Credit Note against it for the amount or line items that need correcting, or cancel the whole invoice if it should not have been raised at all.
Why is there no Cheque option when I record a payment?
Payment method is only Cash or Bank. Record a cheque as a Bank payment and put the cheque number in the reference field. It is a detail on the payment, not a method of its own.
A customer paid me more than the invoice, or paid before I raised one. Where does that go?
Record it as a Customer Deposit, not a Receive Payment. You can apply it against a real invoice later once one exists. The mirror on the vendor side, a Vendor Deposit, works the same way for money you pay in advance.
Should I use Purchase Invoice or Bill?
Use Bill for the everyday case, a vendor bill with no Purchase Order behind it. Use Purchase Invoice when a Purchase Order and goods receive precede it, so the three can be matched against each other.
An employee’s reimbursement claim isn’t showing up as something I can pay.
Check it has actually been Accepted and then Posted by Finance. Posting is what creates the payable balance. A claim still sitting at submitted or Accepted has not created anything to pay yet.
Related
- Reference: Price List
- How to: Setting up a Price List
- How to: Sales Invoice and Sales Order
- How to: Issuing a Credit Note
- How to: Purchase Invoice
- How to: Bill Payment
- How to: Receive Payment
- How to: Issue Payment
- How to: Claiming an expense reimbursement
- How to: Finance reports
- How to: Sales reports
- How to: Purchase reports
- Reference: Using Reports