Learn the concept
This is the step-by-step. For what it is and how it fits the bigger picture, read Service Customer in the reference.
This is the step-by-step. For what it is and how it fits the bigger picture, read Service Customer in the reference.
Setup task
What this does
A service customer turns one of your customers into a supported account: you choose which service features they get, and you can give them a portal to raise and track their own tickets.
Open Customers
Go to Menu > Service > Customers.
The tabs
- Company and Persons. The customer and their contacts.
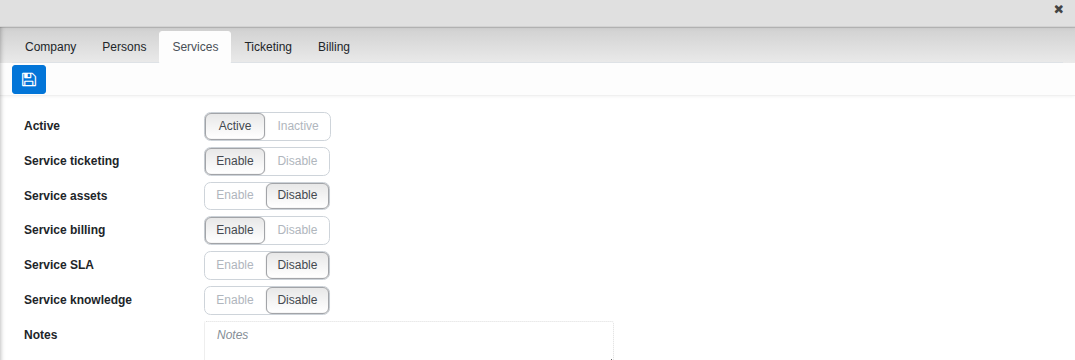
- Services. Switch Active on for this customer, then Enable whichever features they should have: Service ticketing, Service assets, Service billing, Service SLA and Service knowledge. Each one you enable adds its own tab.
Give them a portal
- On Services, Enable Service ticketing. A new Ticketing tab appears.
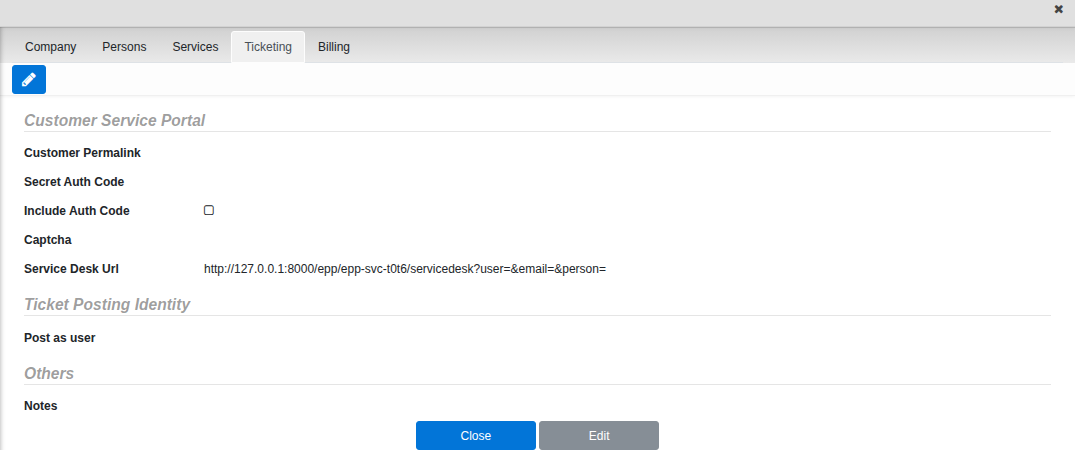
- On Ticketing, set the Customer Permalink and a Secret Auth Code. Turn on Include Auth Code if you want the code baked into the link you share; otherwise the customer enters it themselves.
- Copy the generated Service Desk Url and share it with your customer. They can then raise and follow their own tickets without a full login.
Good to know. Requestor search on a new ticket only finds customers with Service ticketing enabled here — if you can’t find a customer while raising a ticket, this is the first place to check.