
Scope: how invitations and self-signup actually work, the standard practice for getting people into the right group, and what delegating this to department managers actually supports today.
What this guide is not: a guide to designing roles and permissions, see Compartmentalizing access for that.
1. Design your roles first
Before inviting anyone, your usergroups need to already reflect the access each role should have. This is not this guide’s territory, Compartmentalizing access covers designing groups around job functions and least privilege in full. What follows here assumes that work is already done.
Further reading. Guide: Compartmentalizing access.
2. The standard practice: decide the destination before you distribute the link
Go to Menu > Settings > Users > Invitations, which opens a screen titled User Invitation Codes, the menu label and the screen’s own title differ, worth knowing so you do not think you have landed somewhere wrong. An invitation is tied to one or more usergroups at the moment you create it, and can be single-use, one specific person, or multi-use, a real, working shareable link several people can join through without you knowing who they are in advance.
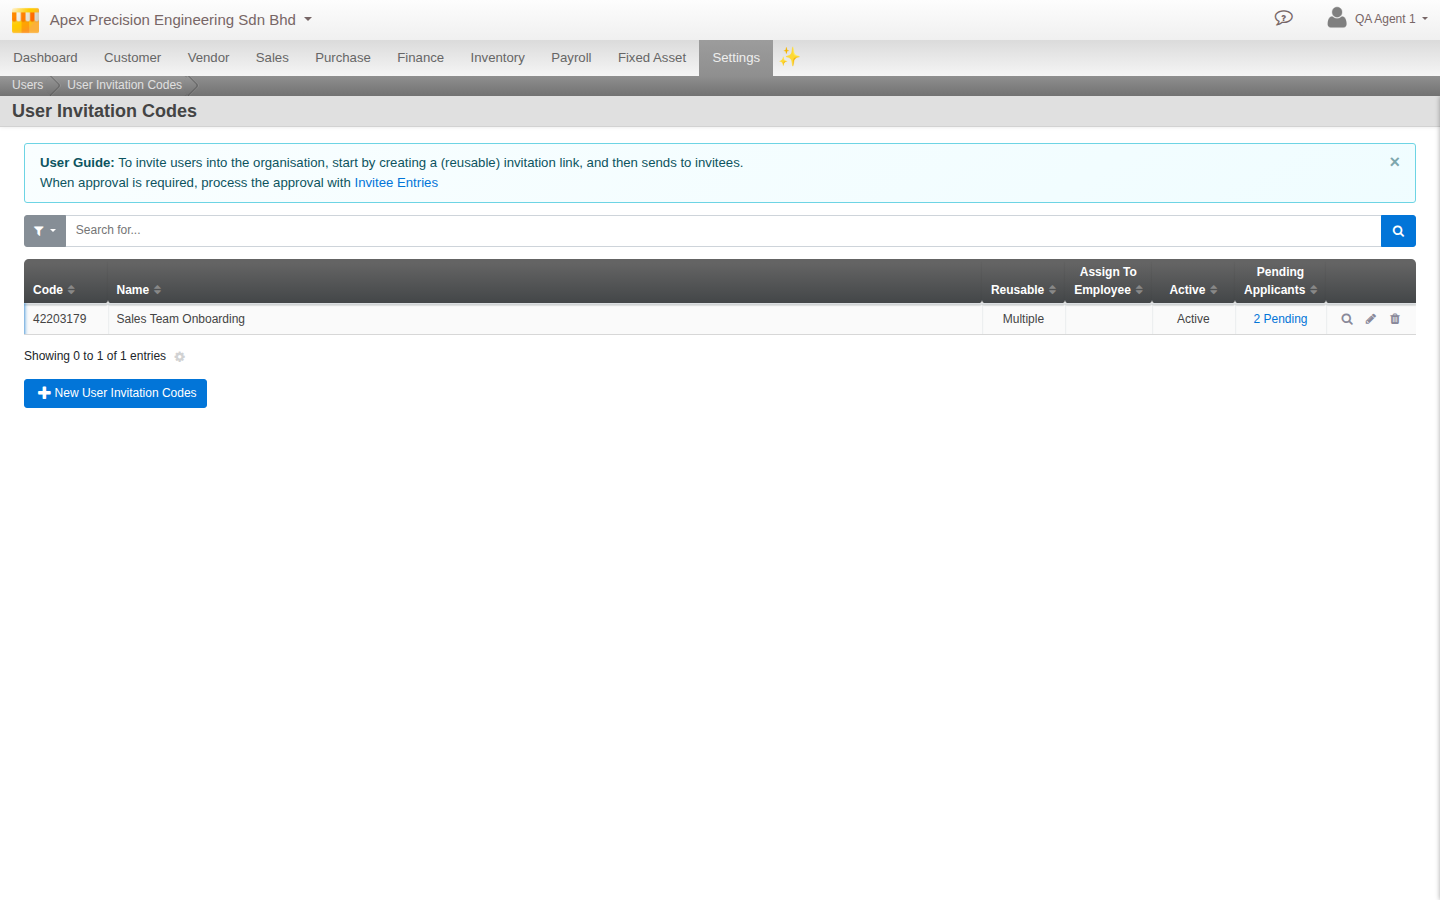 User Invitation Codes: every link you have built, one row each
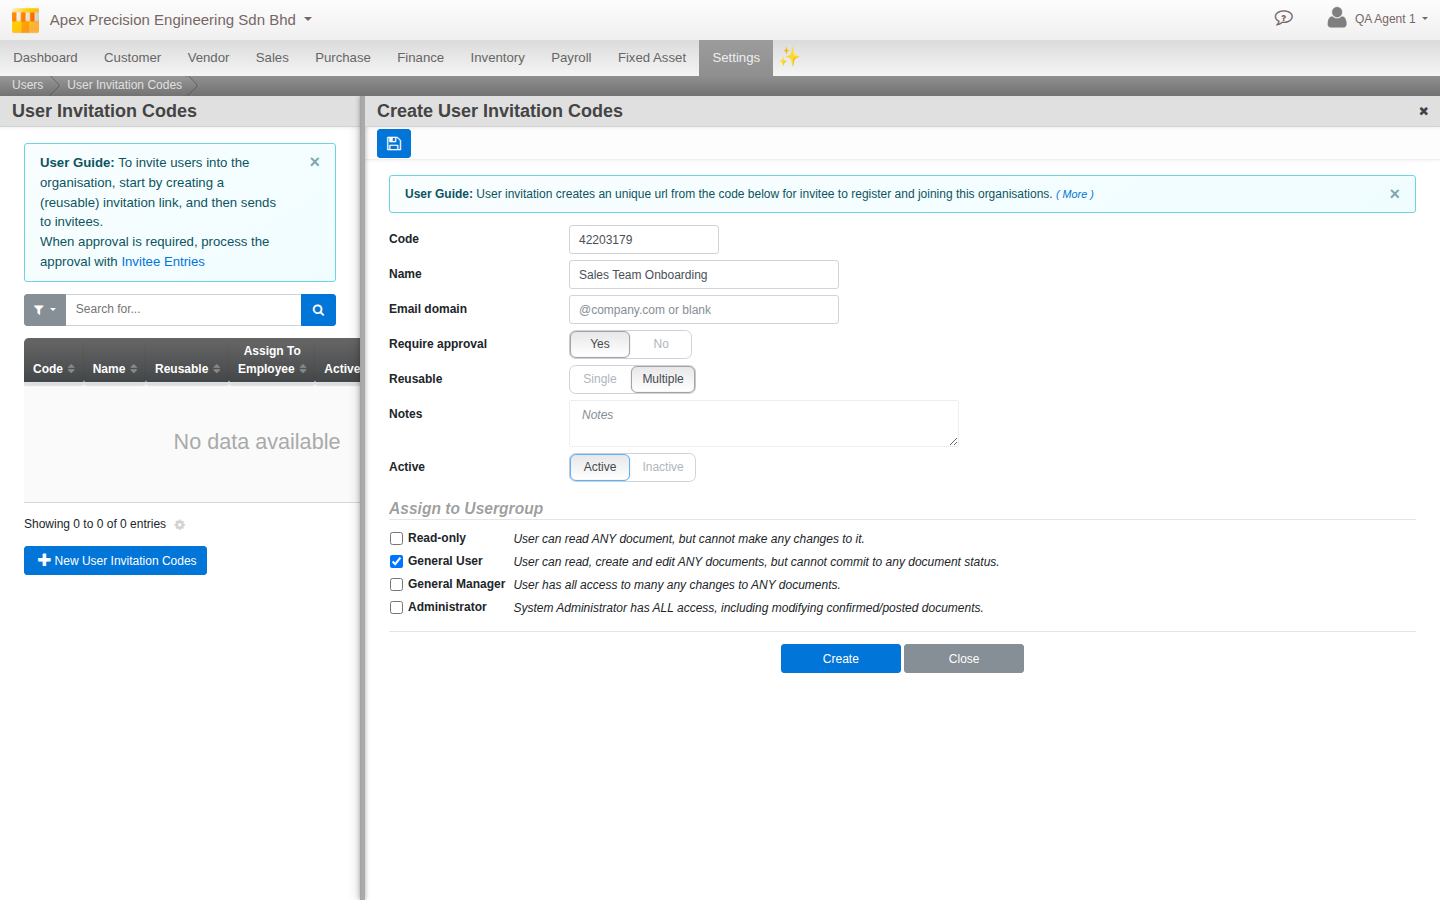
The important part to understand correctly: the usergroups a person joins are fixed when the invitation or link is created, not chosen later. A multi-use link tied to your Sales usergroup only ever produces Sales members, by design, that is the whole point of the link, a pre-configured front door for exactly that group. This is not a limitation to work around, it is the standard, correct way to use it, decide the destination once, then let the link and the approval step each do one clean job, placement is decided up front, approval is purely a yes or no on letting that person in.
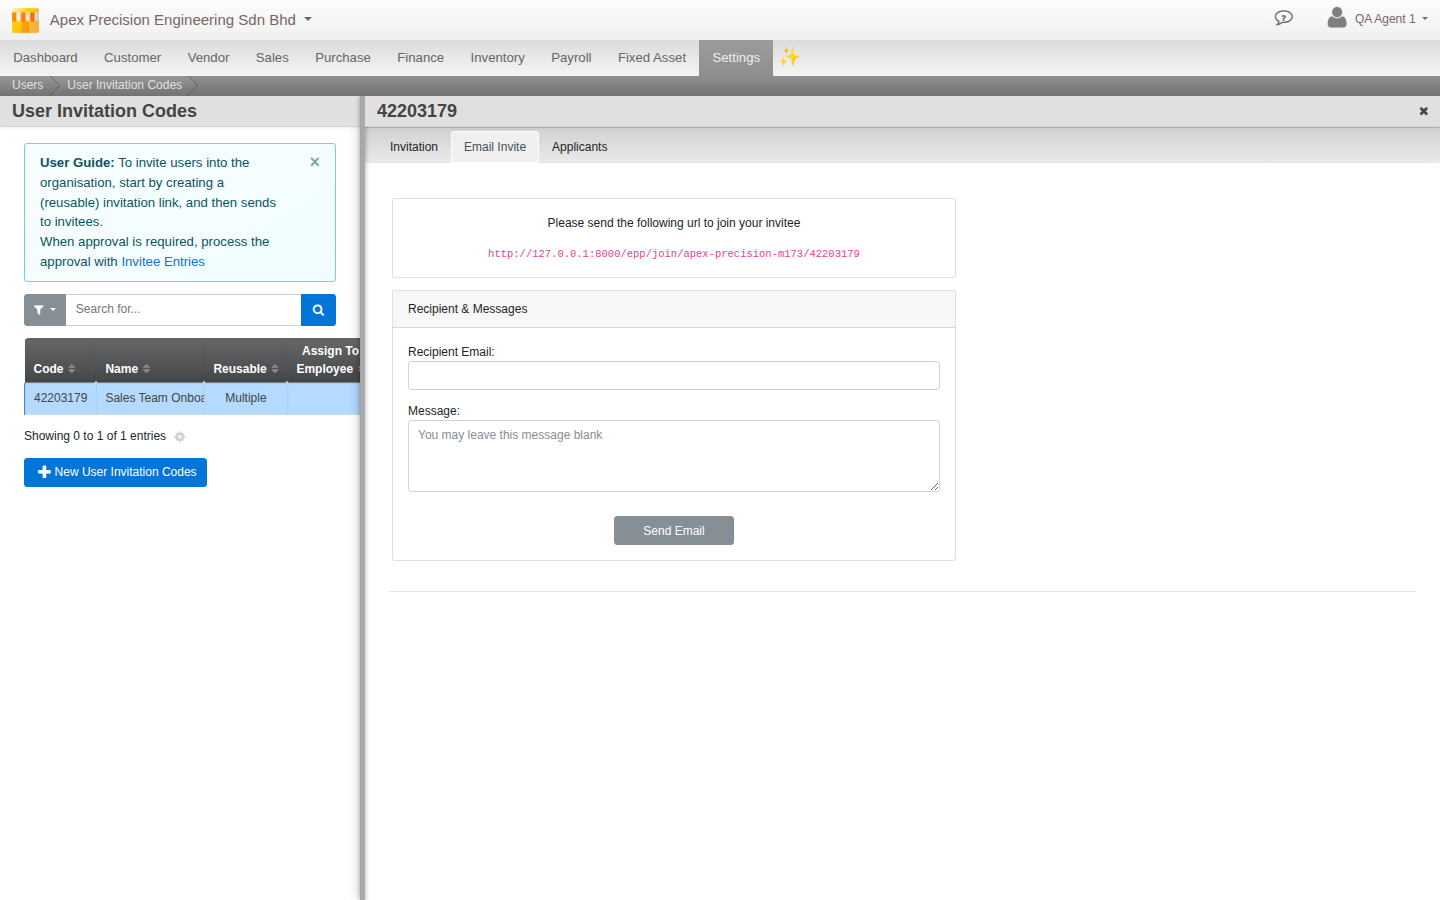
Once built, the link itself lives on a real, working URL you hand out however suits you, an email, a chat message, an intranet post.
Further reading. Reference: Invitations.
3. Delegating to department managers: what actually holds up
What works well. Build one multi-use link per department, each tied only to that department’s own usergroup, before you distribute anything. Hand each department manager only their department’s link, along with rights to review and approve applicants, not to create or edit invitations themselves. Because approval never lets anyone change which groups a person joins, section 2, a manager processing their own link’s applicants can only ever place people into the groups you already locked in when you built it. This gives you real compartmentalization by department, achieved by how the links were built, one clean front door per department.
4. Running the approval queue
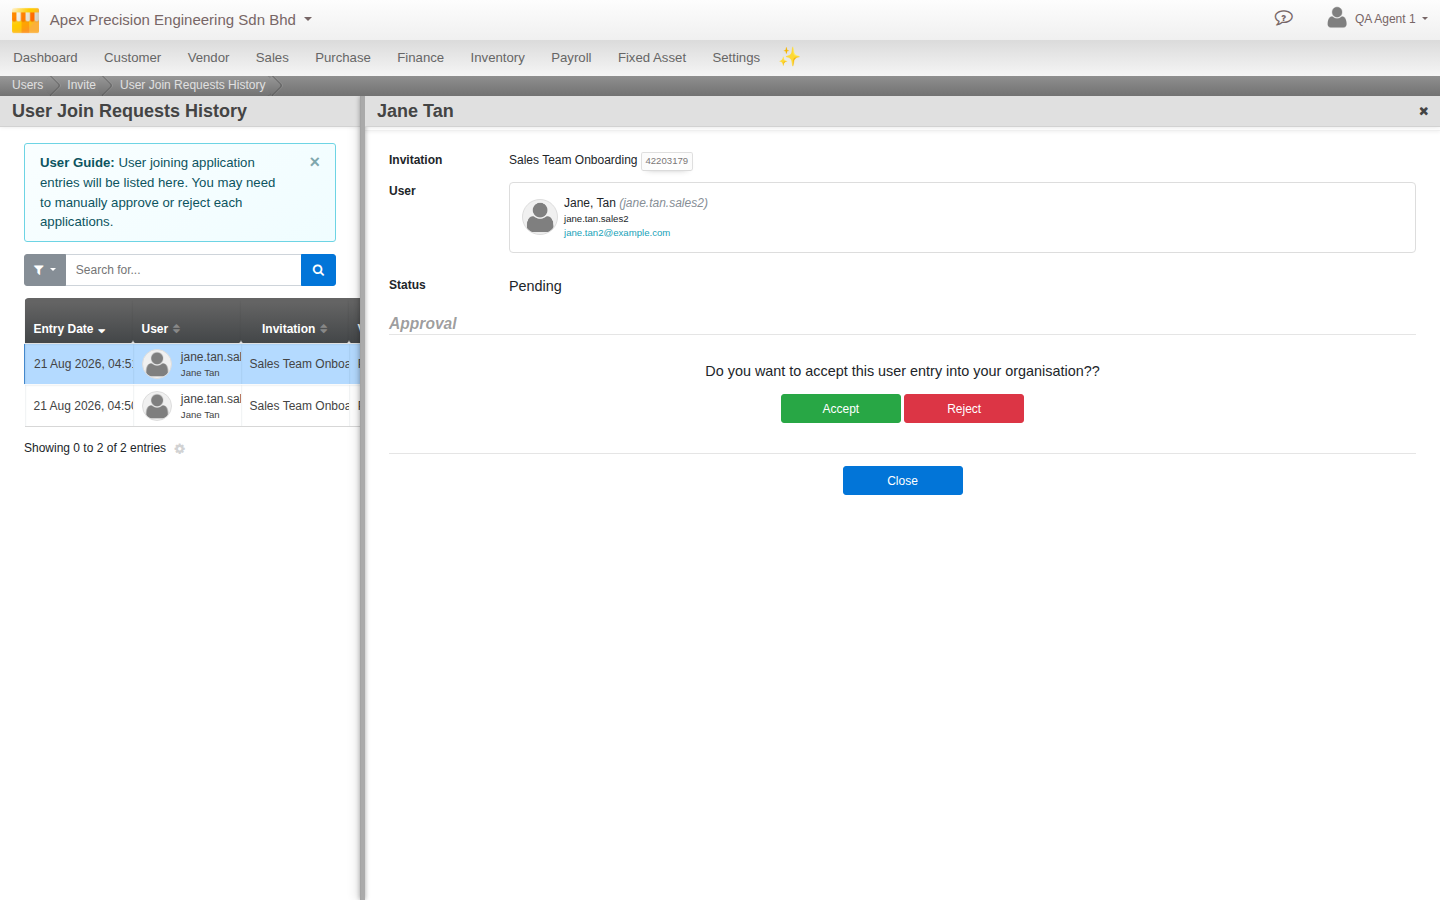
Open the invitation you want to review from the Invitations list, and use its own Applicants tab to see who has come in through it. Each applicant is a plain accept or reject, nothing more, the groups they join were already decided when the invitation was created, section 2. Once you are done with a link, whether that is the end of a hiring wave or you simply want to stop new signups through it, switch it to inactive, there is no automatic expiry to rely on.
What’s next
A few notes as you bring your team onboard:
- Designing the usergroups themselves, and the broader philosophy of least privilege, is covered in Compartmentalizing access, not repeated here.
- There is no bulk invite-creation tool, a single-use invitation is created one at a time. A multi-use link is the real “many people, one action” mechanism, use it whenever a group of people share the same destination.
Scenarios and troubleshooting
Someone joined through our link and is in the wrong group, and I cannot find a way to change it during approval.
That is expected, see section 2, approval never sets groups. Reject them and have them join again through the correct department’s link, or adjust their usergroups directly on their user record afterward.
Our signup link is still accepting new people weeks after we stopped hiring.
Expected too, see the note in section 2, there is no expiry. Open the invitation and switch it to inactive.
I gave a department manager permission to create invitations and they accidentally invited someone into another team’s group.
This is the real gap covered in section 3, invitation-creation rights are seniority-scoped, not department-scoped. Move to giving that manager approval rights only, on a link you create centrally for their department.
Related
- Guide: Compartmentalizing access
- Reference: Invitations