Learn the concept
This is the step-by-step. For what it is and how it fits the bigger picture, read Customer in the reference.
This is the step-by-step. For what it is and how it fits the bigger picture, read Customer in the reference.
What this does
Adding a customer creates the master record you then use across Sales and Finance: quotations, orders, invoices and statements all point back to it.
Open Company
Go to Menu > Customer > Company and click Create.
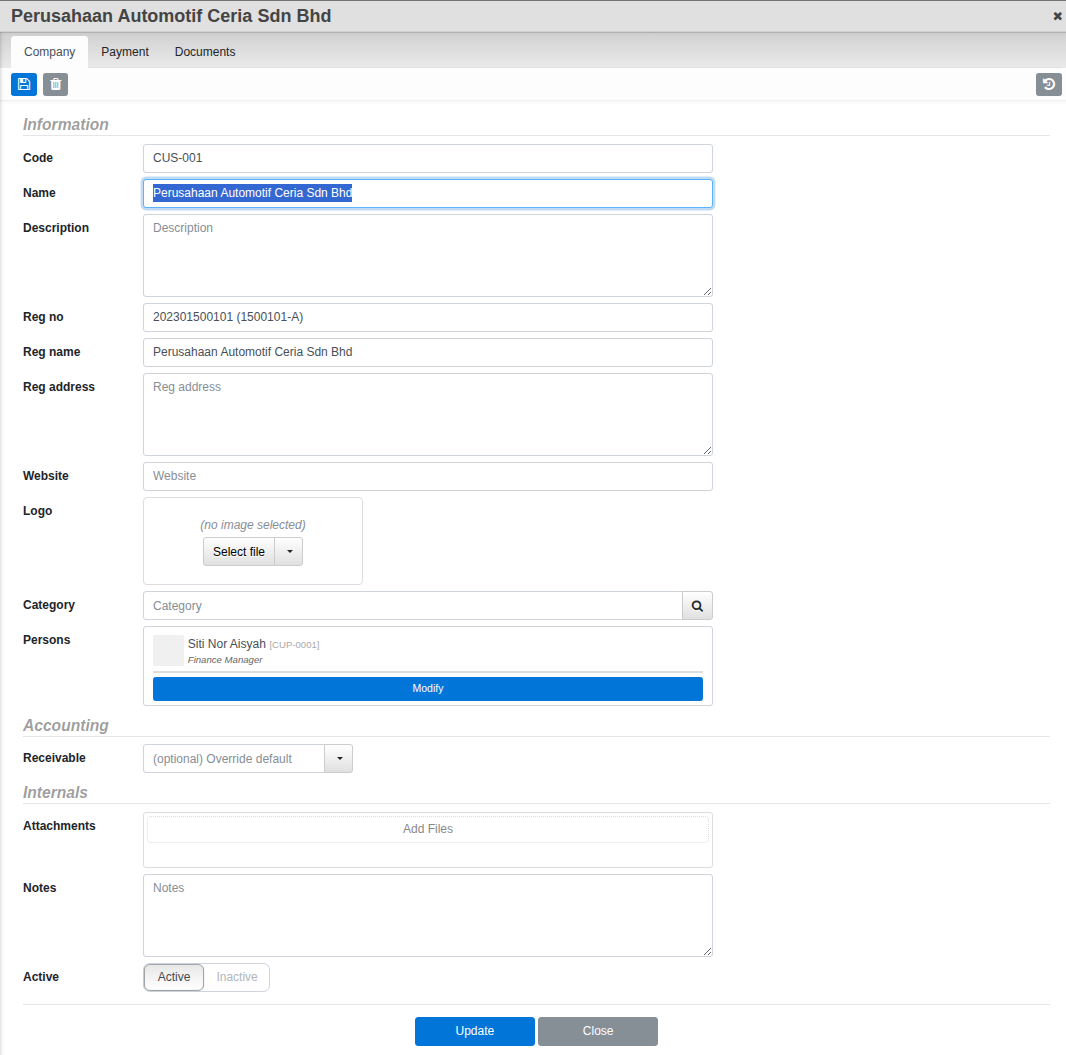
The tabs
- Company. The core details (below).
- Payment. Payment terms and related settings.
- Documents. Attached files for this customer.
A Details tab also appears if your organisation has added custom fields for customers.
Fill in the Company tab
- Enter the Name. Leave Code blank to have it numbered automatically.
- Add the registration details: Reg no, Reg name and Reg address, plus Website and a Logo if you have them.
- Set a Category if you use them, and add the people you deal with under Persons: click Modify, then Add, and pick an existing contact or type a new name to create one on the fly (with their designation and phone).
- Under Accounting, the Receivable field is optional: leave it blank to post this customer’s sales to your organisation’s default receivable ledger, or pick a different one to override it just for this customer.
- Set Active and click Update.
Good to know. Receivable only needs setting here if this customer should post to a different ledger than your organisation’s default. Customers and vendors are separate. A business you both buy from and sell to is set up in each area, because the accounts behind them differ.