
Scope: default account resolution, Bank Accounts versus ledgers, opening balances, and the real verification toolkit.
What this guide is not: a guide to data import order (see the data import order guide) or to inventory cost and location (see the inventory guide).
1. Default accounts, and how they actually resolve
Go to Menu > Finance > Settings > Default Settings, then open the Ledgers tab, titled Finance Default. The screen this menu item opens on first load is a different tab, Customer Default, with the Sales-side payment toggles, not the AR/AP dropdowns, so switch tabs if you land somewhere else. This is where you set the ledger every document falls back to when nothing more specific applies, a default Accounts Receivable, a default Accounts Payable, Retained Earnings, and a handful more, sales, discounts, returns, accrued payroll, and others, each grouped by area.
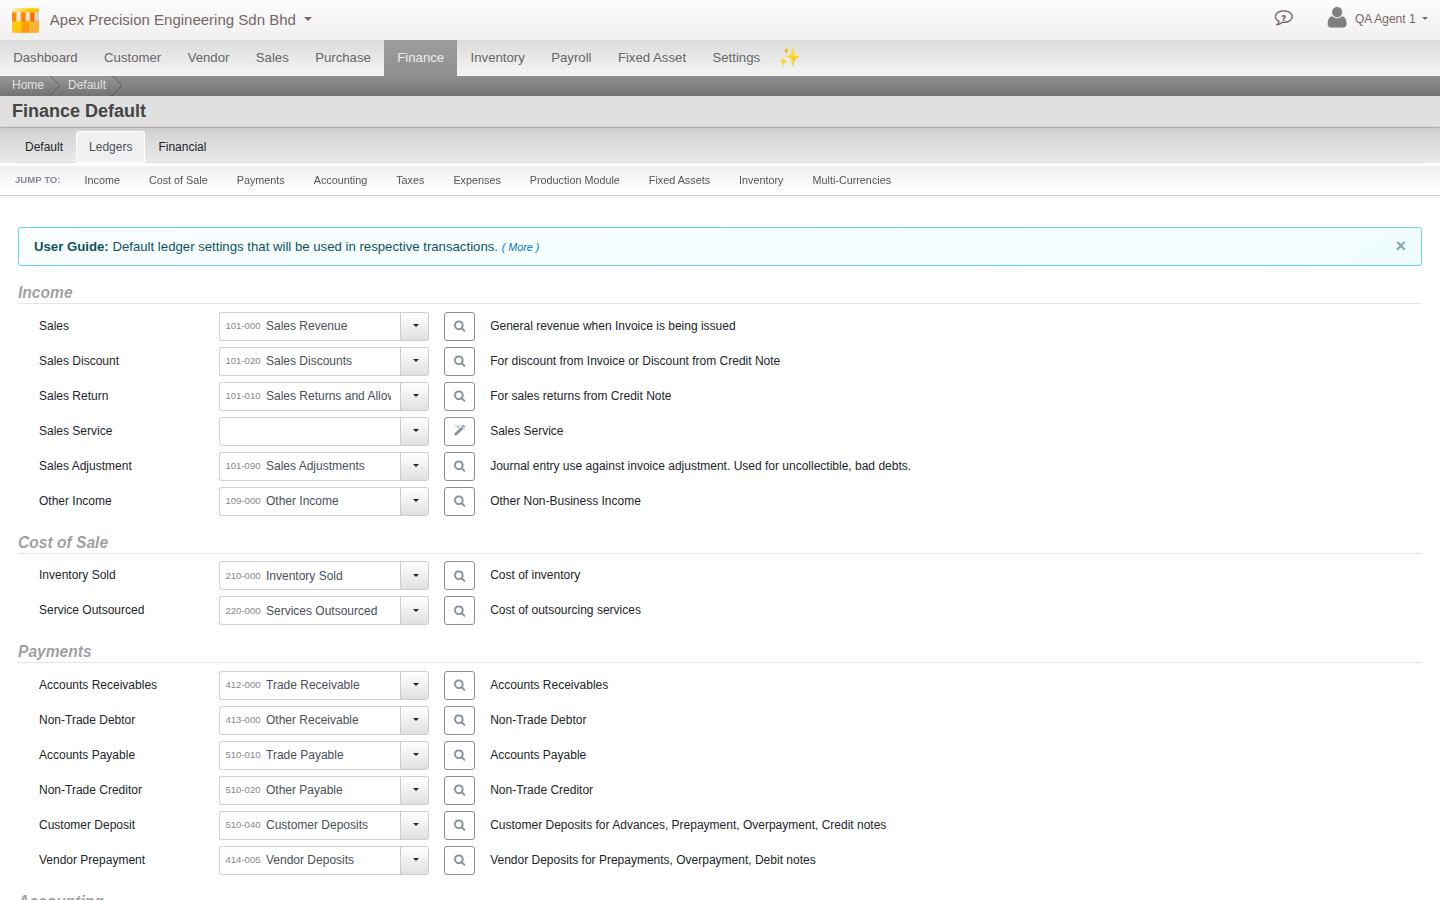
A document does not simply use the org default outright. Accounts Receivable and Accounts Payable follow a real three-step chain: an override set directly on the document itself, if any, otherwise an override set on the Customer or Vendor record, if any, otherwise the organisation default you set here. Most organisations only ever need the default, set once. The override exists for the exceptional case, one customer whose balance needs tracking on its own ledger, without you having to remember to pick it every time you invoice them.
2. Bank Accounts and ledgers: which comes first
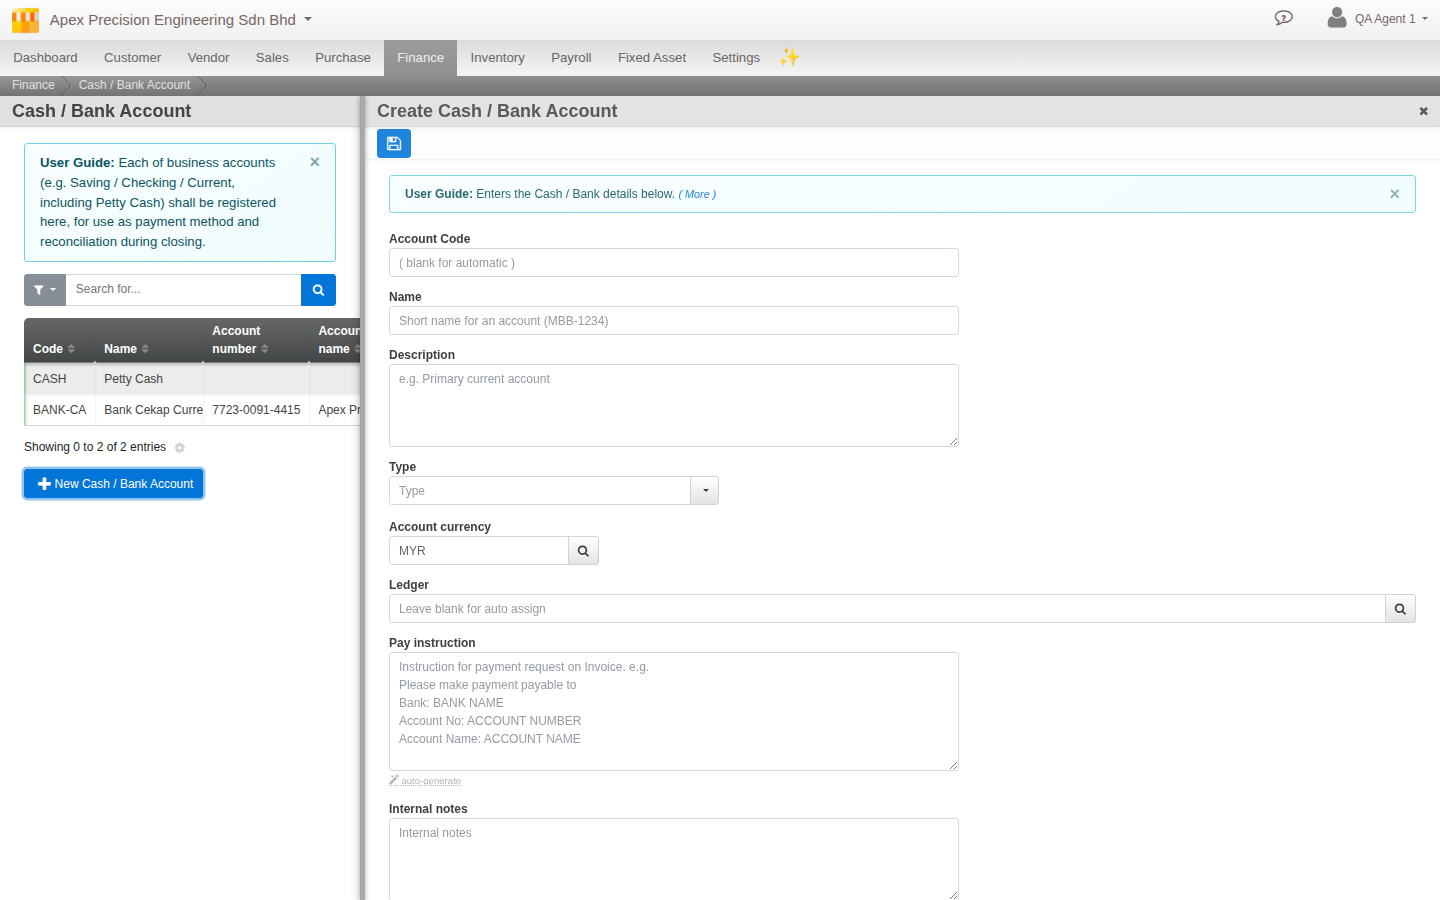
Go to Menu > Finance > Settings > Cash and Bank Accounts. A Bank Account is not the same record as a Chart of Accounts ledger, it carries the bank-specific detail a ledger does not, bank name, SWIFT code, account number and name.
Create the Bank Account first. Leave its Ledger field blank, the form itself says this is the recommended path, and Cloudby creates and links the matching ledger account for you automatically, mapped to a sensible type, a bank account becomes an asset ledger, a credit facility becomes a liability ledger, and so on. You can instead attach an existing ledger if you deliberately want to, but that is the exception, not the default flow. Either way the relationship is one Bank Account to one ledger, and the Bank Account’s own details, name and currency, stay the source of truth, kept in sync onto the ledger every time you save.
3. Opening balances, done correctly
Cloudby has no separate opening-balance import tool, and does not need one, the ordinary Journal Entry already carries what is needed, most people simply do not know to use it that way.
Two things make the difference between an opening balance that ties out cleanly and one that quietly breaks reconciliation later. First, set the entry’s type to Adjusting Entry rather than leaving it as an ordinary entry, this is a real, structured field, not a note in the description, and it is date-constrained to the fiscal year’s opening period so it cannot drift, Cloudby will reject any other date outright and name the exact date it expects. Second, for every AR or AP line, use the line’s own association field to link it to the real Customer or Vendor record, rather than typing their name into a text description. Debit the customer’s receivable or the vendor’s payable line, associated to that real record, and credit a suspense or opening-balance equity ledger for the same total, one entry per customer or vendor, or grouped sensibly, whichever is more practical for the volume involved.
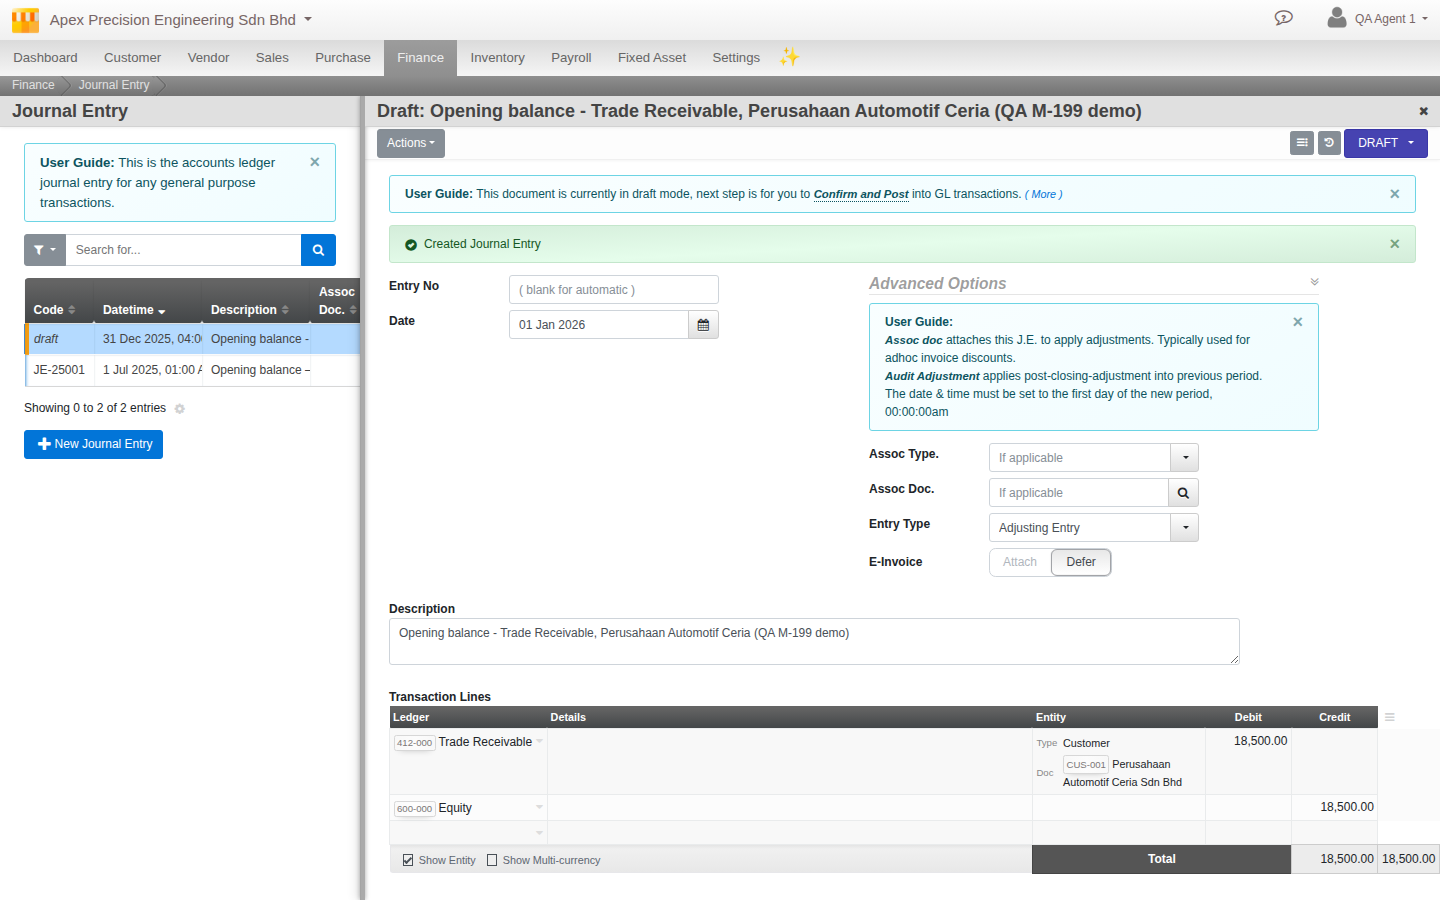
Once every opening balance is in, that suspense or equity ledger should net to zero, or to a small, explainable residual you can account for. That is your real signal the migration’s opening position is complete, not just that every row imported without an error.
4. Verify before you trust it
Four real tools, in the order you would naturally reach for them.
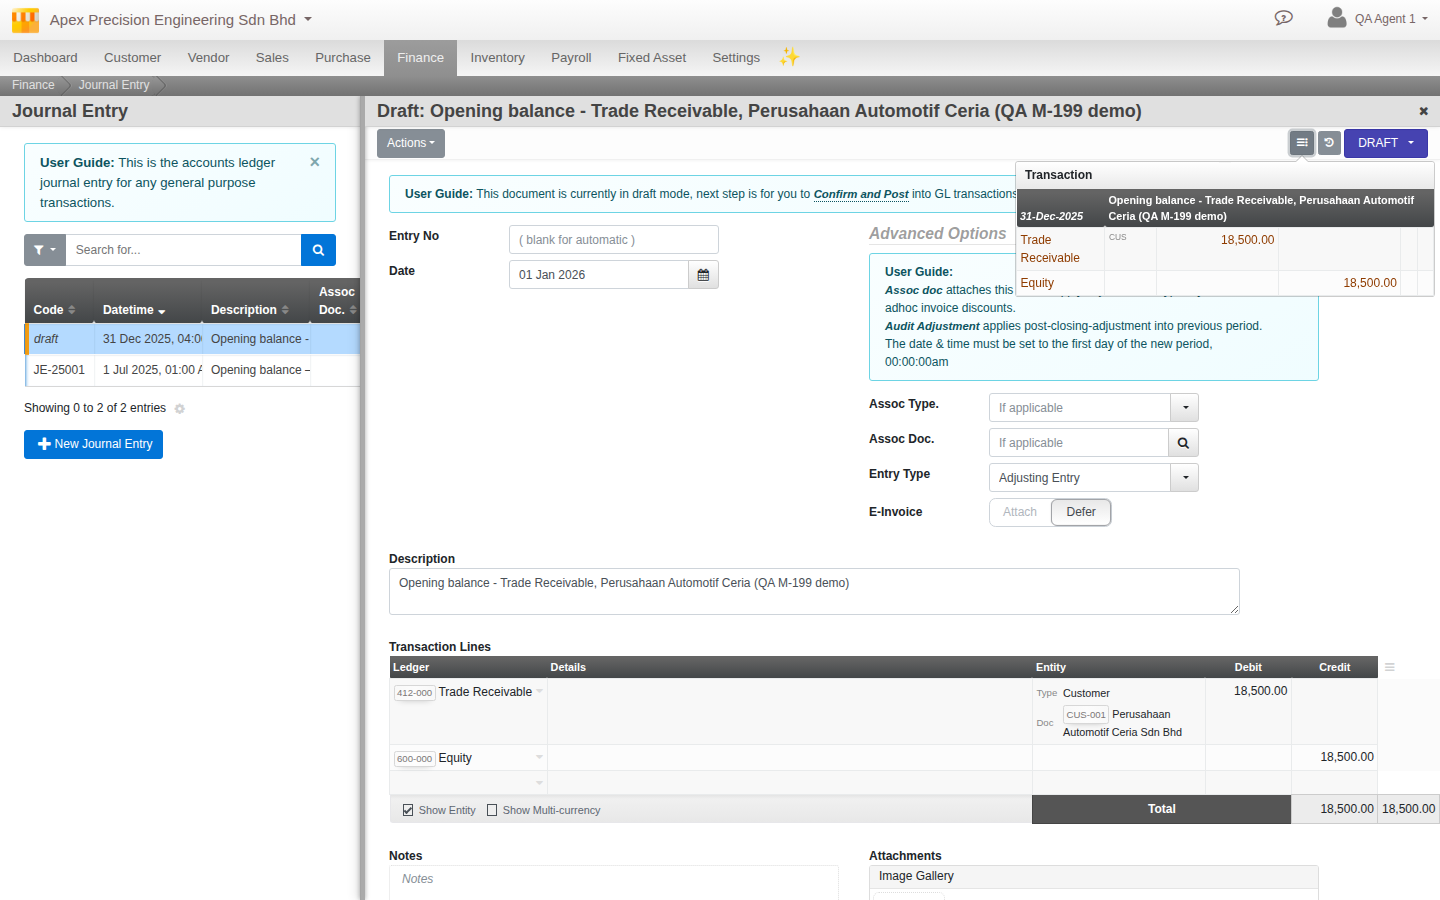
Transaction Preview. On any document that posts to the ledger, including one still in Draft, a Transaction button shows the exact double entry it will create. This is not a separate simulation, it runs the same posting logic the real commit uses, the only difference is the final save step. Use it before confirming anything you are unsure about.
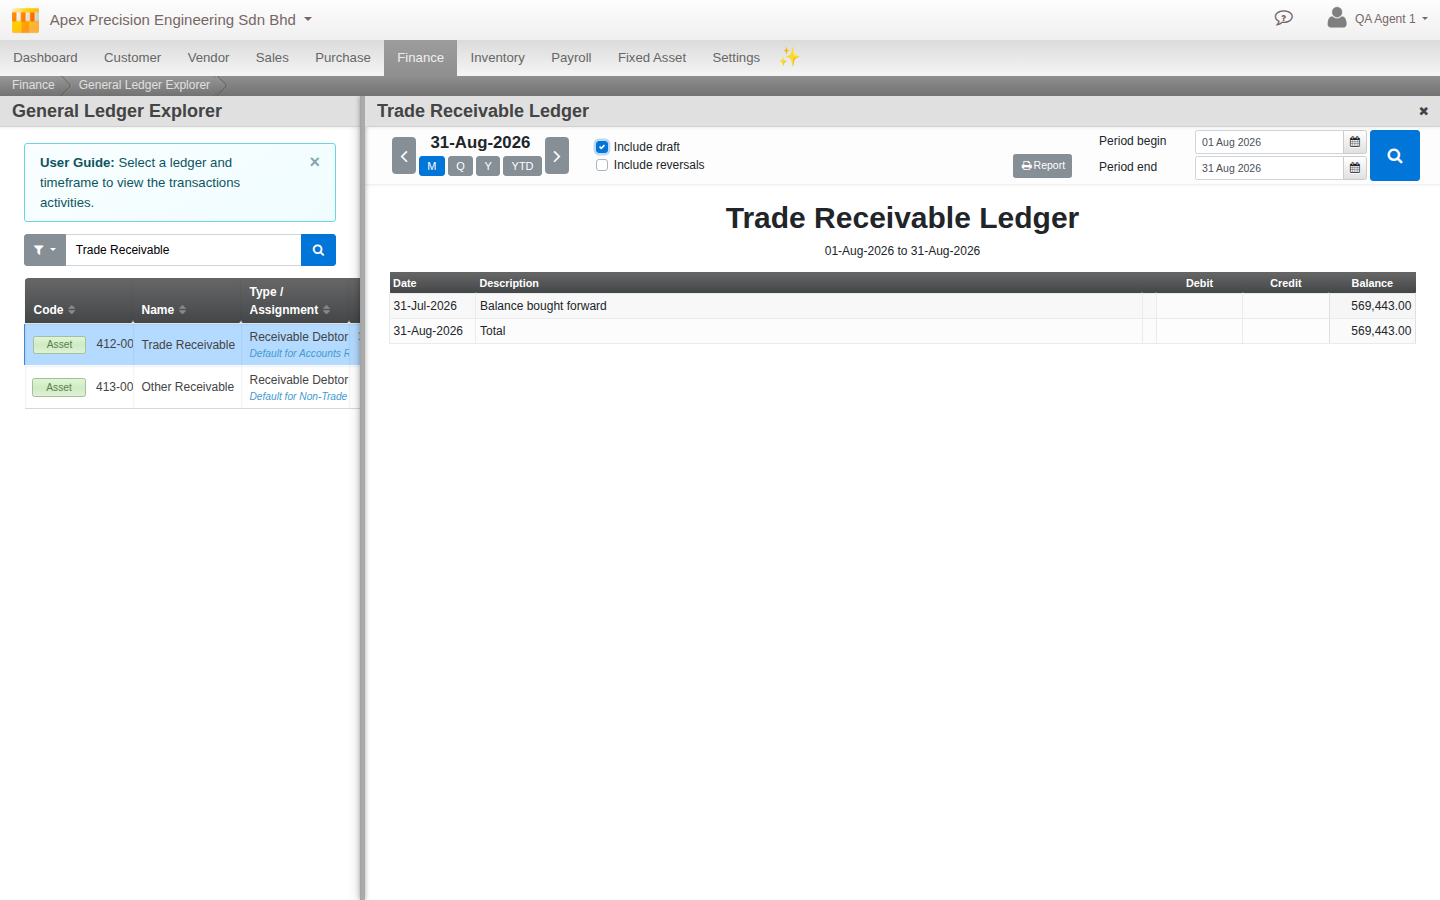
General Ledger. Reached from Menu > Finance > Explorer, this is the real per-account drill-down, every transaction that has posted to a specific ledger, over whatever period you choose. A related screen, Subledger, adds a customer, vendor, employee, or project filter on top, useful once you want one associate’s balance specifically rather than the whole ledger.
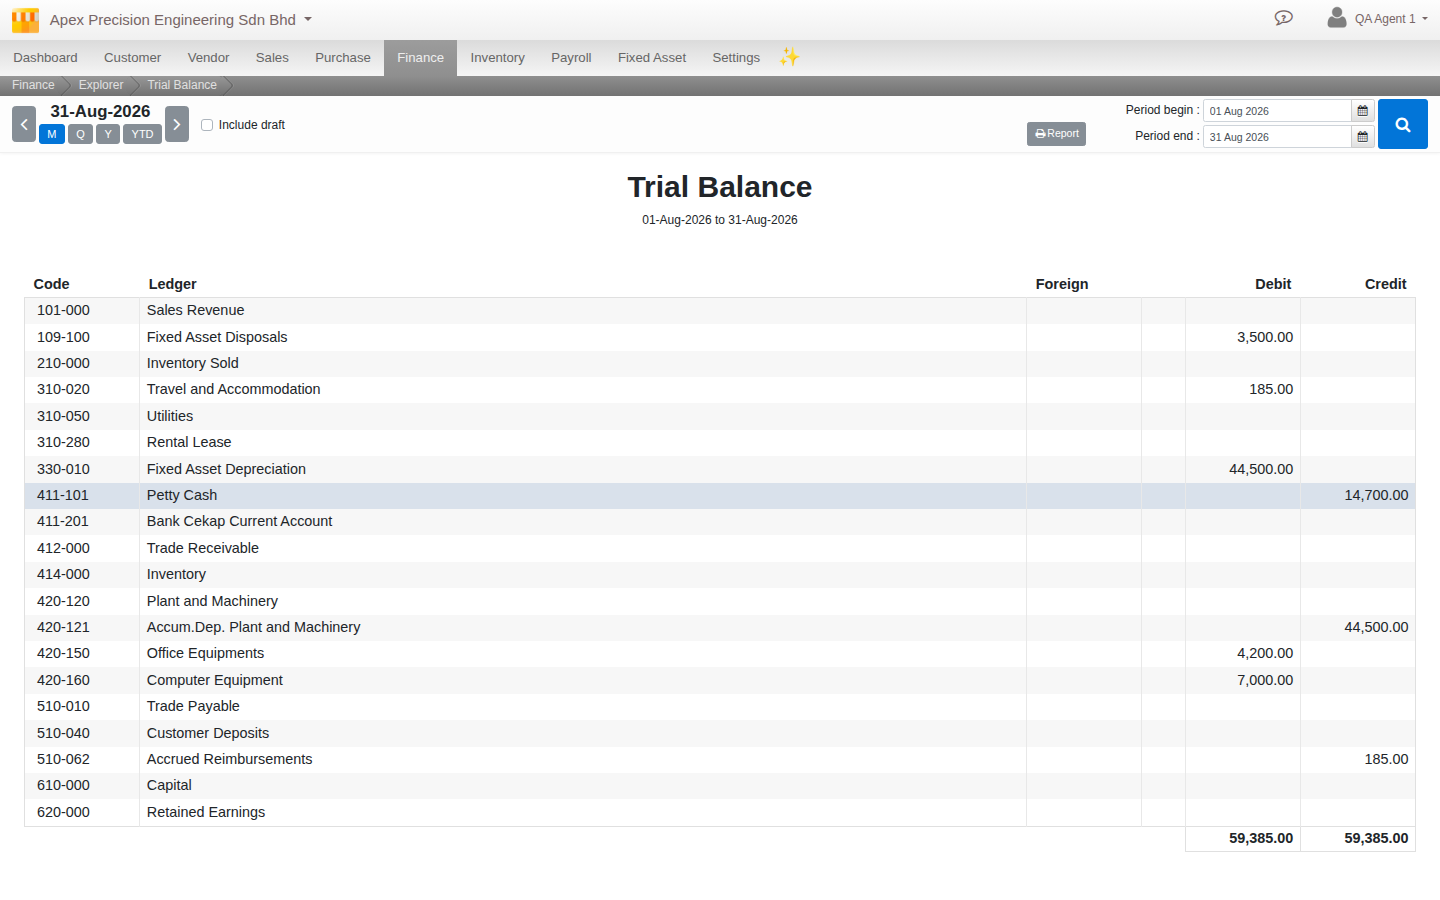
Trial Balance. Also under Menu > Finance > Explorer, a full balance listing across every ledger for a chosen period, with the option to include still-draft entries. Click any row to drop straight into that ledger’s General Ledger view.
Further reading. Reference: Activity and Audit.
5. If it is already wrong
If something has already posted incorrectly, the fix is not to reverse and re-enter it by hand. That is exactly what Document Overrider exists for, covered in the sysadmin guide, not repeated here, a power admin tool for correcting a posted document’s date, serial, and a handful of other fields directly, with the same real caution that guide already covers, there is no undo, so use it deliberately.
Further reading. Guide: Configuring and administering your Cloudby organisation.
What’s next
A few notes as you keep working through your finance setup:
- Data import order, including where Journal Entries and other finance documents sit relative to master data, is covered in its own guide, not repeated here.
- Inventory cost and location, which also posts to the ledger, is covered in its own guide too, with the same verification tools applying there.
- There is no self-service backup or restore point available to an organisation admin today. The practical safeguard is verifying each step with the tools in section 4 before moving to the next, not a safety net to fall back on afterward.
Scenarios and troubleshooting
A customer’s aging report does not include a balance I know I entered.
This is almost always a missing line association on the opening Journal Entry, see section 3. Open the entry, check whether each AR line is actually linked to the Customer record, not just described in text.
My opening-balance suspense ledger does not net to zero once everything is in.
That is a real signal, not noise, see section 3. Something was missed or double-entered. Open the suspense ledger’s own General Ledger view, section 4, and work through what remains.
I am not sure a document will post the way I expect before I confirm it.
Use Transaction Preview, section 4, on the draft document itself. It shows the real double entry before you commit to anything.
I created a Bank Account and now see two ledgers that look related.
Check whether you picked an existing ledger during setup instead of leaving the field blank, section 2. If so, the auto-created one may be an unused duplicate, safe to review and remove if nothing has posted to it.
Related
- Guide: Configuring and administering your Cloudby organisation
- Reference: Activity and Audit